


Design SEO-Friendly Website Structure
Site architecture, when applied and implemented correctly on a website, aids in the good indexing and crawling of the website by search engines.
When crawling the site, Google and other popular search engines are built to detect the structure of a website. This assists websites with the standard site structure to be indexed better than others when search engines return users’ search results.
To get a good website structure for SEO optimization, there are a series of principles, elements, and best practices that need to be followed and included in the website structure.
Why Does Site Structure Matter for SEO Ranking?
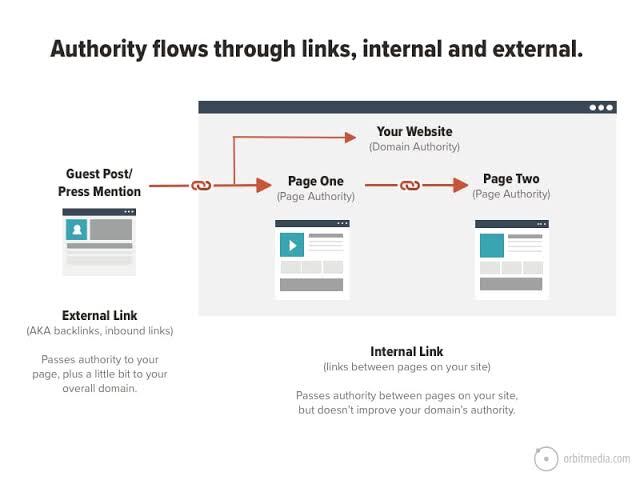
Website Structure is important for search engines like Google, Bing, e.t.c to crawl the website effectively; this is most especially dependent on how the internal linking of a website is structured. Most search engines consist of a crawler, an index, and an algorithm. Google, Bing, e.t.c., follow links from other websites to detect the existence of a website.
After detecting the website, it starts to crawl all the internal links that connect all the pages that make up the website structure. These links are the method Google uses to experience websites and then index the web contents and pages.
For example, if a new blog post is created, Google detects it through a link from another website or a previous blog post; it can also detect the new post from the homepage.
The headings, links, and contents are all crawled by the search engines before they are saved in the index.
This means the internal link structure of the website must be well organized if the website is to be detected and indexed by Google.
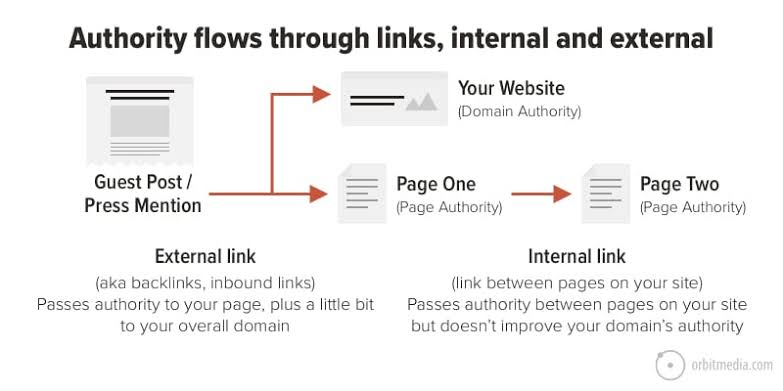
Other than assisting search engines like Google and Bing to crawl and index a website, good internal linking in the website structure gives the search engines clues to what products and content the website is made of.
This most especially helps websites like product sales websites, blogs, e.t.c., to rank well on Google as long as they have a good website structure.
Highly important content and less important content are classified by Google using the internal linking structure of the website. The links should be more concentrated on the most important pages. The concentration of links on each webpage is proportional to the position of the webpage in the website hierarchy.
Another key element of website structure that Google and other search engines make use of is content context.
For example, a webpage or website that focuses on keyword research should have its link in websites in the same content/context; this helps such a website with better indexing and ranking by Google.
The following key points should be noted :
– A good website structure helps Google navigate to the site and index all web pages.
– A good website structure lets Google know which pages are most important and should be ranked.
– Internal links are important to get your site indexed.
– The context/niche of internal links is important to get a good site ranking.

Best Practices for Implementing Keyword hierarchy into designing SEO-friendly website structures.
For the best results in Google indexing and ranking, keyword hierarchy has to be fully implemented into a website structure.
This technique is implemented in both sales websites as well as blogs.
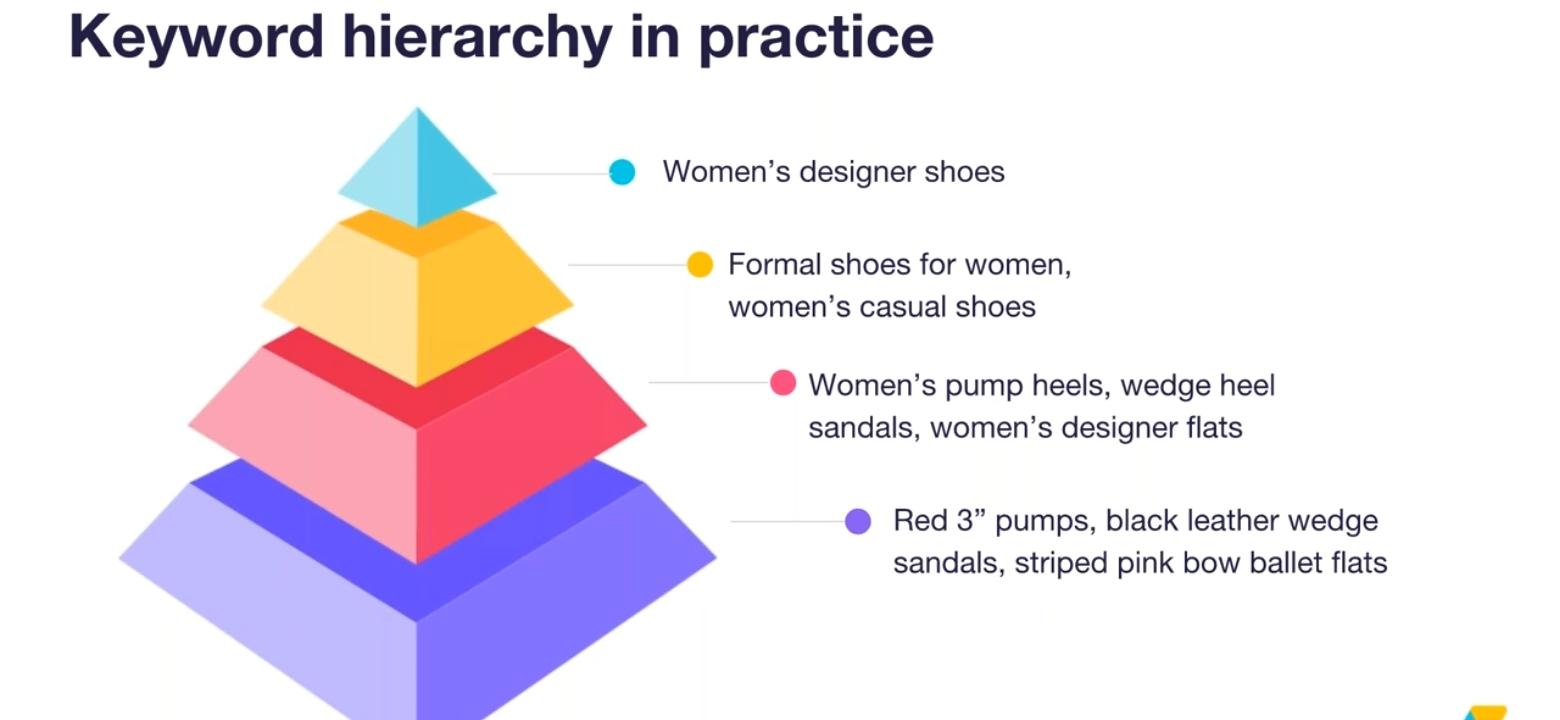
Keyword hierarchy focuses on structuring the website’s keyword targeting to funnel from the broadest terms to the most specific terms.
The whole website structure can be viewed in the form of a pyramid, with the most important keyword phrases at the lowest section.
The number of keywords used for each webpage is proportional to the relevance of the entire website structure.
For websites designed for marketing, the keyword phrases should be well simulated to align with the natural shopping process or behavior of buyers.
For instance, a website that sells “designer clothing for men”, which is a broad term that when entered into the search engine by prospective buyers brings forth a broad range of results.
The phrase “designer clothing for men” should be aligned to the homepage of a website, which also correlates with the top of the website structure pyramid.
A more specific search query such as “men’s black button-down short” should be aligned with the lowest part of the website structure pyramid, which also correlates to the product sales page.
Implementation of keyword hierarchy is important because search engines tend to accept organized keyword targeting.
What types of site structures are there?
Website structure often falls into one of four categories. It is simpler for designers to develop a meaningful website information architecture when they have a thorough understanding of website structures. Let’s investigate each of them separately.
A Hierarchical Model
One of the most prevalent styles of site architecture is the hierarchical model. In online applications with plenty of data, the hierarchical model is frequently employed. The hierarchical model is like a tree in that it has a trunk (like a homepage) that branches out into categories and pages. The hierarchical paradigm is well-illustrated on websites like CNN.com and BBC.co.uk.
Sequential Model
When guiding users through a sequence, such as onboarding or the creation of a new account, sequential models are frequently used. This model can be used by UX designers to develop process flows. WikiHow.com’s articles are excellent instances of pages that were created with sequencing in mind.
Matrix Model
One of the earliest website structure types is the matrix model. The behavior of this model is distinctive and unconventional. Users have options for their next destination thanks to a matrix-style framework. The best ways to navigate these sites are through internal links or searches. The matrix model is well illustrated by Wikipedia.
Database Model
A dynamic method of website structure is a database model. This kind of website structure should be created by designers using a bottom-up methodology, robust information architecture, and taxonomic best practices. A wonderful example of a database model is Medium.com and the posts and pages it contains.
Important tips for good website structure and SEO ranking
An excellent website structure helps a website to rank well in search engines and provide a good user experience for visitors; all of these work together to drive maximum traffic to a website.
For good ranking and user experience outcomes, there are important elements and best practices that need to be included in a website.
Some of these tips and elements are discussed in the categories :
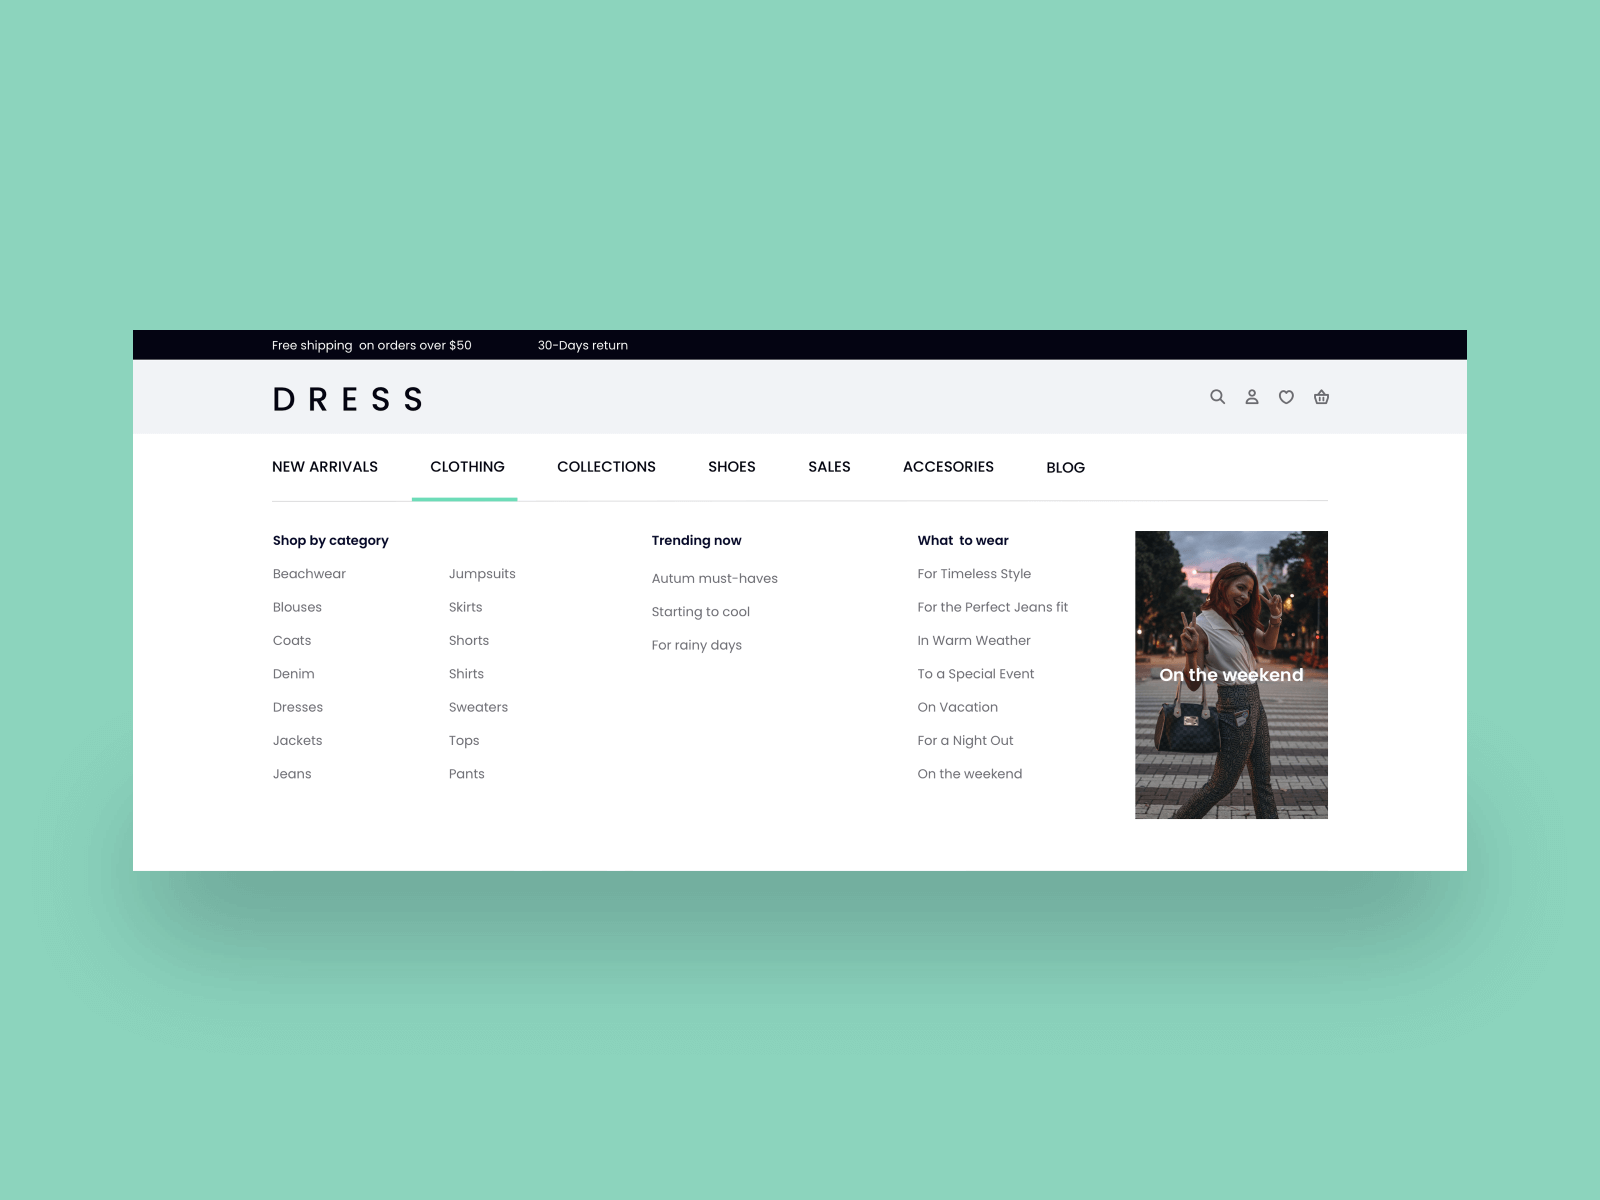
Use of Navigation Menu: This is a menu that is characteristic of websites; it is positioned at the topmost edge of the website window. Through the navigation menu, users can easily access other sections of a website. A good navigation menu aids a good user experience, and this assists in Google ranking and drives more traffic to the website.
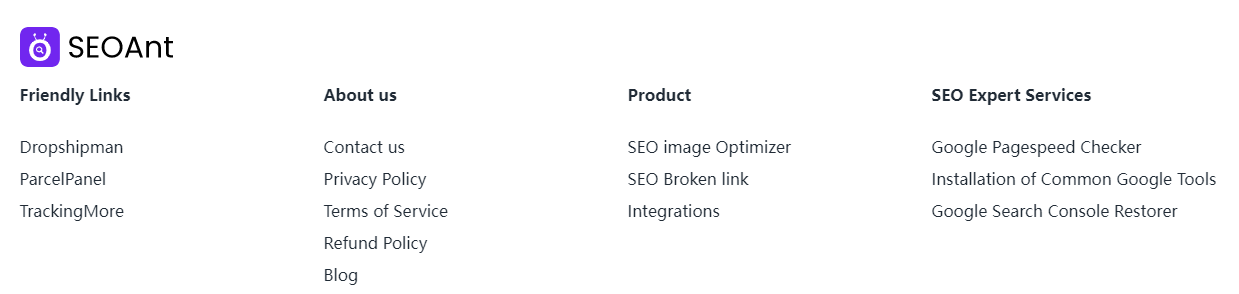
Usage of Footer: The footer is placed at the bottom edge of the website and works just like the navigation menu, although it contains less information and gives users fewer access options compared to the navigation menu. A good footer is also very important for SEO ranking.
Making use of Internal Linking Structure: This is concerned with links in a website; to give a good user experience and Google ranking, the links in a website need to be connected to quality websites and websites that have good content and quality website structure.
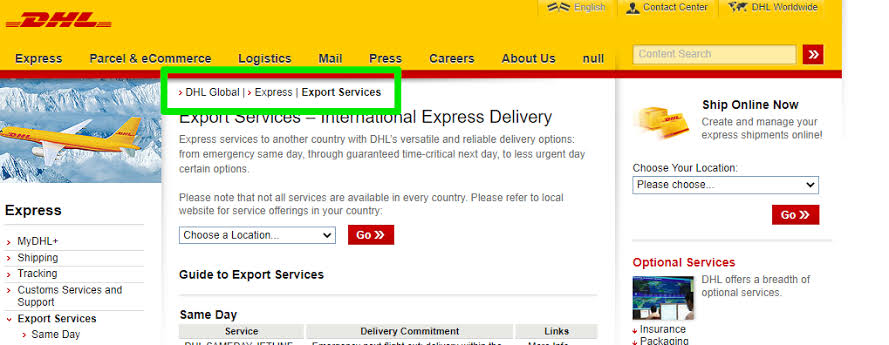
Usage of Bread Crumbs: Breadcrumbs are installed as a means of internal linking in a website structure. It is put in place to show a visitor the exact page they are on a website and help them navigate to other pages of the website easily. This also aids a good user experience and search engine ranking.
Use of HTML Sitemaps: A large number of website owners no longer include HTML sitemaps in the website structure, but it is a best practice that aids easy website navigation and search engine ranking.
A good website structure is important to any website, even if the website already ranks high in search engines because it still helps the website perform better in the long run.
This is mostly because websites with good website structure integrate better with the Google search engine.
Application of Keyword Hierarchy:
The keyword hierarchy assists the website in describing what each webpage is about.
This is made possible through keyword phrases that are relevant to each webpage.
Also, users can navigate keyword phrases logically throughout the website to guide search engines and customers from page to page.
This makes it easy for customers to locate the content or products of interest easily, and thereby a good user experience is possible.
Users are convinced to revisit from time to time, and this grows the website traffic rapidly.
Below is a diagrammatic representation of how keyword hierarchy works in practice :
To be able to provide a good keyword hierarchy for a blog or shopping website, keyword research has to be done.
This part of the article will explain in detail how keyword research is conducted professionally :
Popular Keyword Research Tools to Enhance Website Structure :
No tool is perfect, and many of these tools serve different research purposes.
In addition to your industry knowledge and intuition, these tools serve as AI assistance that helps produce the best SEO website structures :
I)SEOBook keyword generator; UberSuggest and Keyword.io:
The SEOBook keyword generator and keyword.io assist in creating initial lists of keyword phrases relevant to the blog or sales website content.
Ubersuggest assists website owners in aggregating all the keywords into relevant phrases using AI technology.

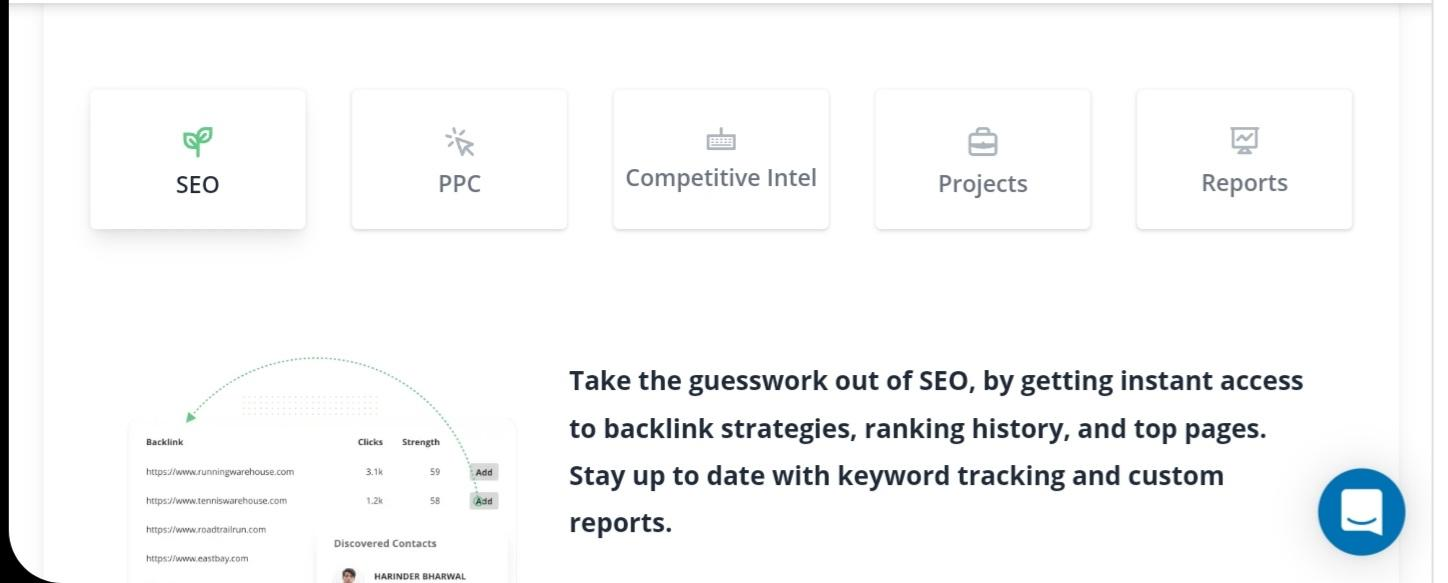
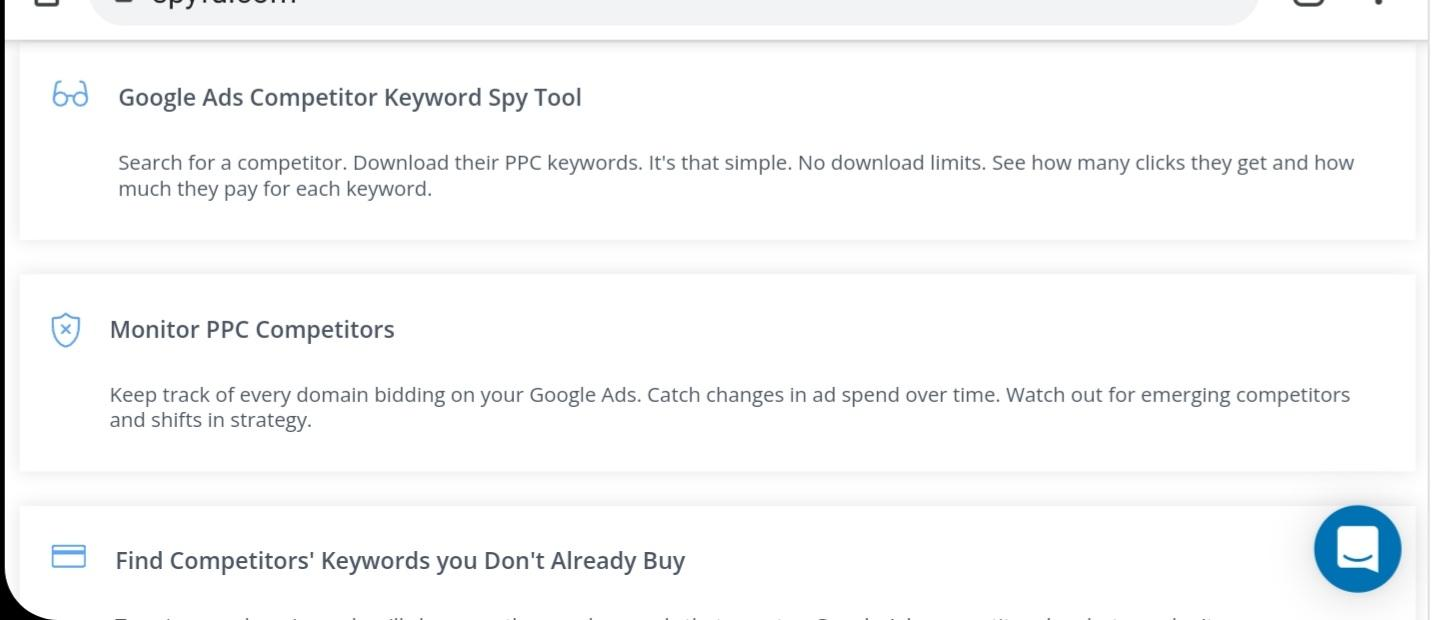
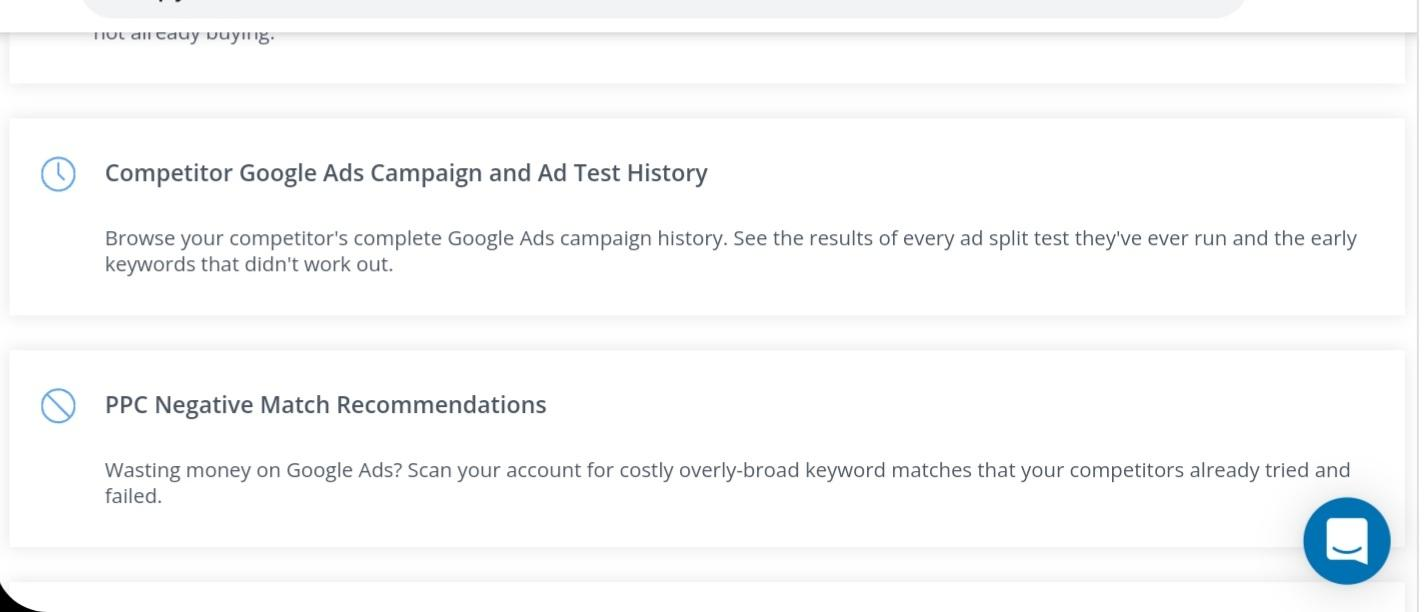
II) SpyFu SEO Tool :
The SpyFu SEO tool is useful for checking the details of each keyword phrase for important features like ranking history, backlinks, search engines, competitor comparison, e.t.c.
SpyFu provides a complete analysis for each keyword phrase.

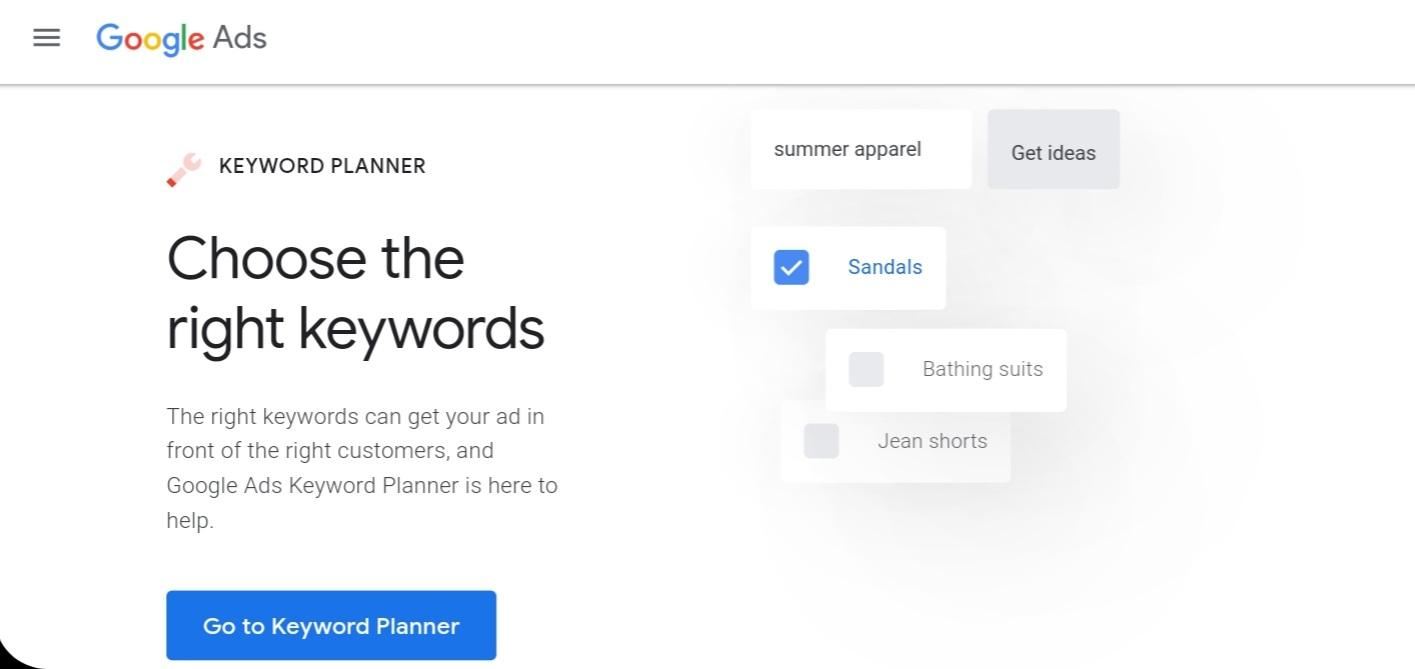
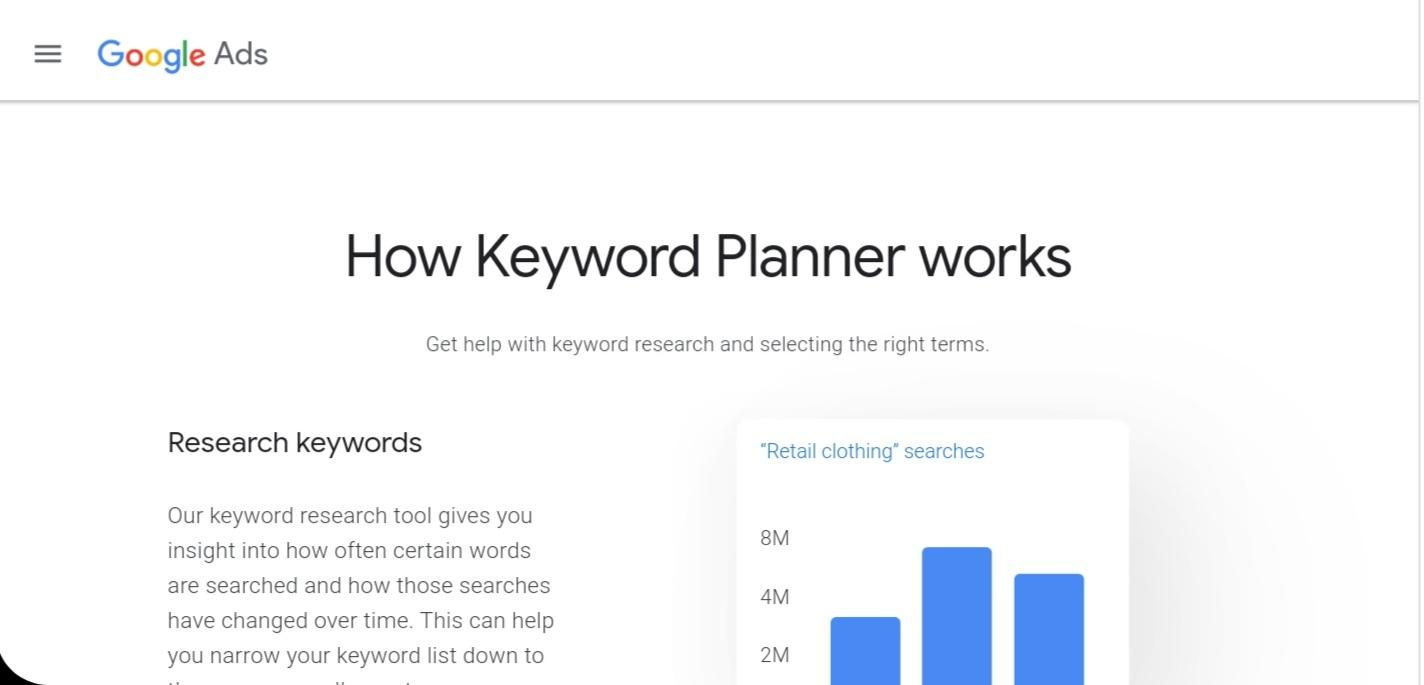
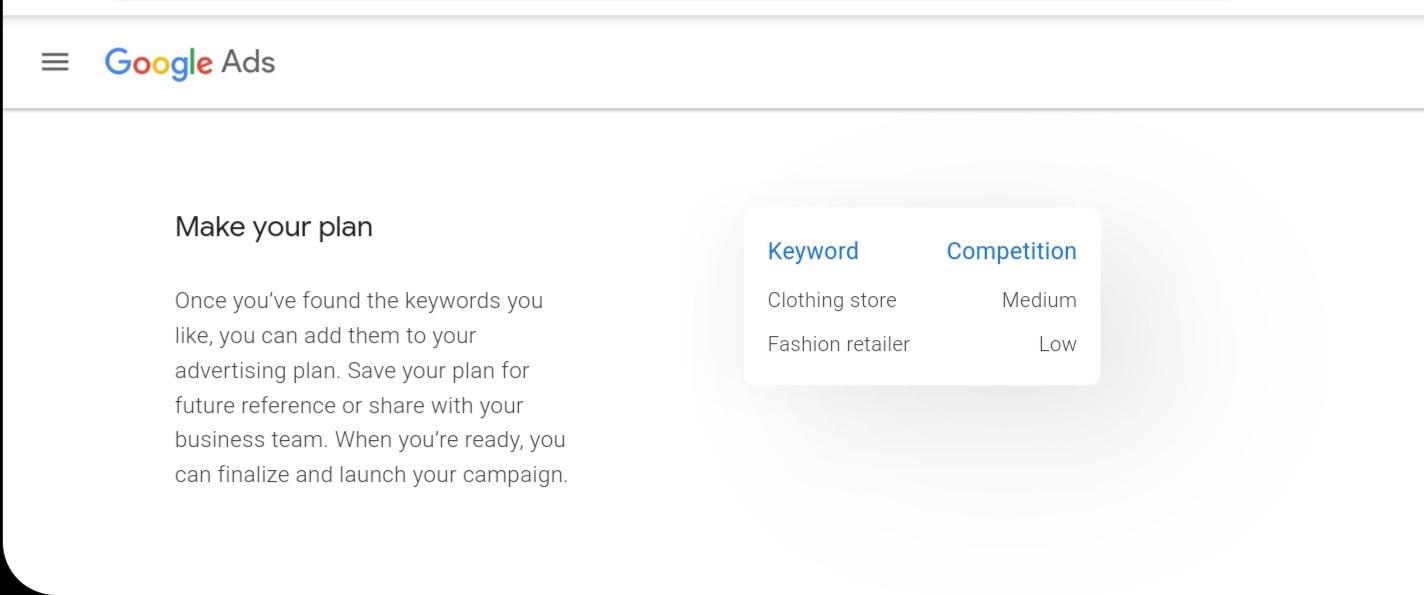
III) Google Keyword Planner:
This is an SEO tool provided by Google; it shows the details of a user’s search engine queries towards a particular keyword.
It also helps website owners that are involved in SEO monetization to get information about pay-per-click data for a particular keyword.
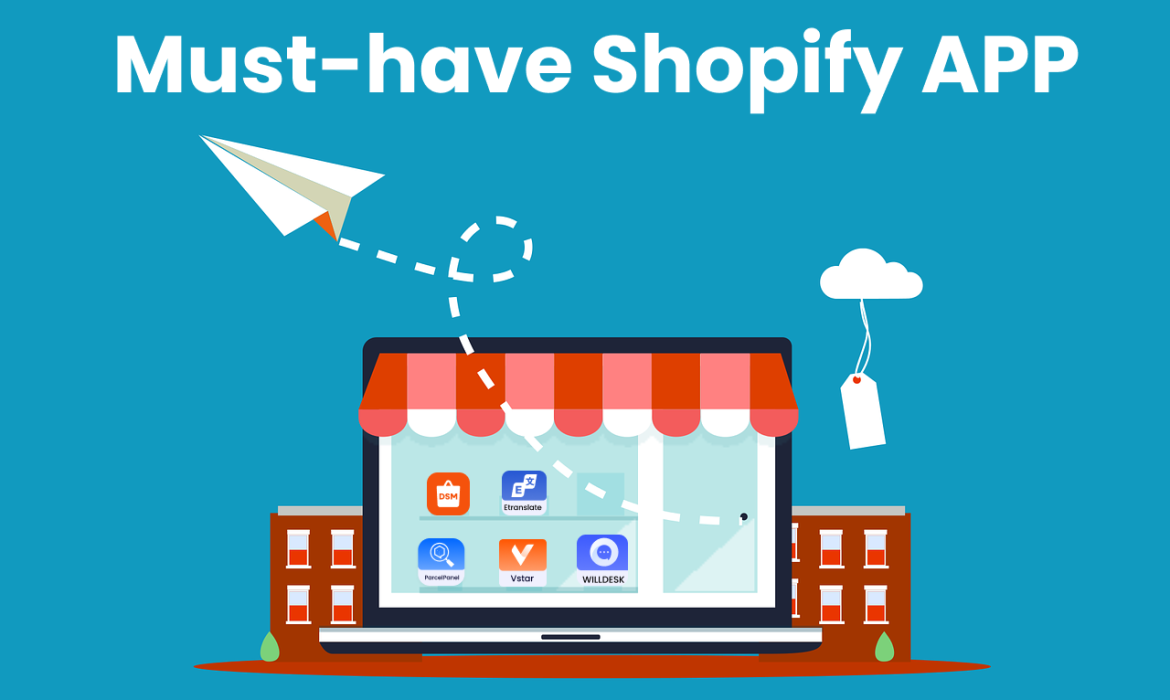
7 Best Shopify APP To Boost Sales
Do you want to generate more sales for your eCommerce store? Here is a better way to do this through Shopify apps. You can install them directly on your Shopify platform, and they will function to gather more traffic to your website, give you more conversions, and make you more profit. What’s more, they are free to use, meaning you don’t have to spend a dime. So, without any further ado, let’s dive right in.
1. iCart Cart Drawer Cart Upsell
Shopify rating: 4.8
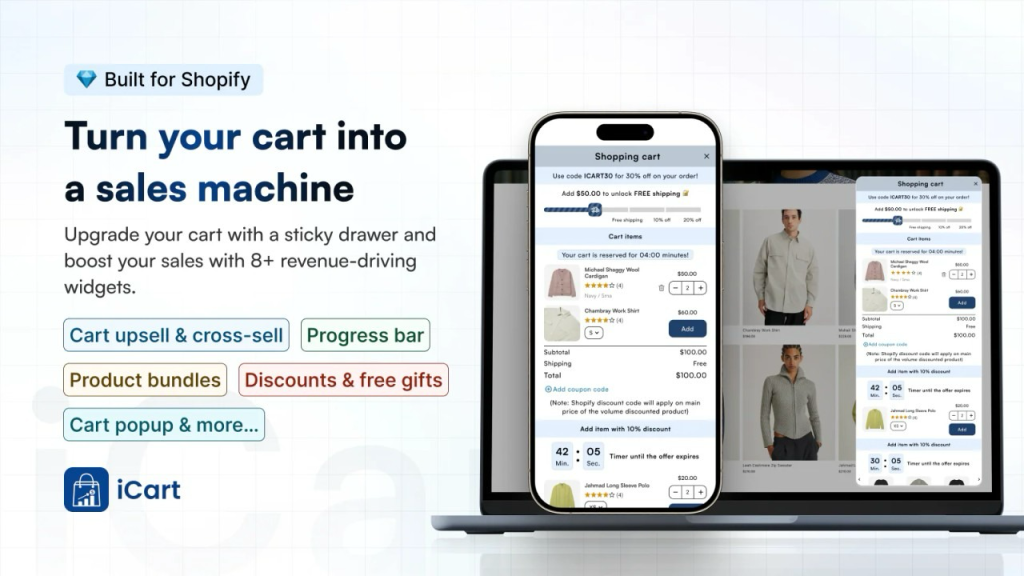
iCart Cart Drawer Cart Upsell is the best Shopify upsell app designed to help merchants maximize their revenue by transforming the standard cart into a high-converting slide-out drawer. The app allows you to display upsells, cross-sells, and promotional offers directly in the cart, engaging customers at the most critical point of the purchase journey right before checkout.
With its intuitive “No-Code” drag-and-drop editor, you can easily design a professional cart that matches your brand’s theme. iCart goes beyond simple upselling by offering advanced engagement tools like progress bars, free gift rewards, and volume discounts, all tracked by detailed analytics to ensure you are maximizing your revenue per visitor.
Key features:
● Sticky Cart Drawer: Replaces the default cart page with a modern slide-out drawer that keeps customers on the product page while they manage their cart.
● In-Cart Upsell & Cross-Sell: AI-based or manual product recommendations displayed directly within the cart drawer to encourage impulse buys.
● Progress Bar: A visual shipping or discount bar that motivates customers to add more items to unlock free shipping or a free gift.
● Volume Discounts: Specialized “Buy More, Save More” widgets that incentivize bulk purchases.
● Drag & Drop Editor: A completely flexible, no-code interface that lets you place widgets exactly where you want them.
● Advanced Analytics: Detailed reporting that tracks impressions, clicks, CTR, and revenue generated by each specific widget to help you optimize performance.
Best for:
● Boosting Average Order Value (AOV) immediately by placing offers where customers are most likely to see them.
● Merchants who want a fully customizable, branded cart experience without hiring a developer.
● Maximizing mobile conversions with a highly responsive design that works seamlessly across all devices.
Pricing:
● Free Plan – First 100 Orders lifetime Free
● Starter: $9/Month – Up to 100 Orders monthly
● Scaler: $19/ month – Up to 200 orders monthly
● Premium: $29/ month – Up to 500 orders monthly
Shopify rating: 4.9

Cross Sell & Upsell is the ultimate upsell app for Shopify, designed to help merchants maximize sales through smart upsell, cross-sell, and bundle recommendations. The app offers upsell opportunities in 8+ key locations across the customer journey, including the product page, cart page, upsell pop-ups, checkout page, and post-purchase page.
With its user-friendly interface and AI-powered upsell recommendations, merchants can offer personalized suggestions based on customer behavior, collections, and order history. Whether you’re looking to drive upsells with custom bundles or highlight add-ons during checkout, Cross Sell & Upsell makes it simple and effective.
Key features:
● Upsell Opportunities in 8+ Strategic Locations: Product Page, Cart Types, Checkout Page, Post-Purchase Page, Home Page, Collections Page, Upsell Pop-Ups, Bundle Discounts.
● Custom Upsell Locations: Add upsells to other areas of your store beyond the 8 predefined locations. Available on high-tier plans, giving you even more flexibility to tailor upsell strategies to your unique store layout.
● AI-Powered Recommendations: Personalized suggestions based on order history, collections, and customer behavior.
● User-Friendly Interface: Easy to navigate and customize, designed for merchants of all experience levels.
● Bundle Discounts: Create product ‘Frequently Bought Together’ bundles to drive more upsell opportunities.
Best for:
● Boosting revenue and AOV (Average Order Value) in a seamless, passive way by strategically placing upsell and cross-sell opportunities throughout the customer journey.
● Saving money by using a single app for all upsell options, instead of downloading multiple apps, which saves time, effort, and costs.
Key features:
● Free Plan Available.
● 14-day Free Trial on any paid Plan.
Basic Plan starting at $29.99 with 3 locations available: Product Page, Pop-ups, and Cart Page.
● Small Store Plan including all 8 upsell locations at $49.99.
● Annual Plans for simplified billing with a 17% discount. Starting at $299.
3. Dropshipman
Shopify rating: 4.9

Dropshipman, as the name implies, is a superb Shopify app for dropshipping purposes. It allows you to import commodities from AliExpress to Shopify. With 7 to 15 days of shipping, you can program your fulfillment.
Dropshipman is designed to help your business scale and manage your orders easily. You can set your most preferred method for shipping to place orders in bulk.
This tool will also auto-update and auto-sync your inventory, product status, and price.
Key features:
● Sourcing service: You source from 1688.com, which is equivalent to Alibaba.com, using your keywords, product photos, keywords, and budget. You can decrease your product costs by 30 to 50%.
● Several shipping services meet the requirements for faster delivery.
● Ability to function with Yunexpress, Yanwen, and 4PX which ship mainly to the US and EU from China.
● More stable and faster deliveries within 7 to 15 days which is more efficient than Aliexpress standard and ePacket.
● Packaging and Label services so that Shopify Store owners can brand their businesses.
Best for:
● Importing products in bulk.
● Making price adjustments for products.
● Decreasing return rates and getting more profit.
● Merchants who want to greatly boost their customer experience.
Pricing: Free
4. Growave
Shopify rating: 4.8 with +1980 reviews
Growave is the only marketing app you need to drive sales and boost customer loyalty. With Growave, you get a suite of powerful tools, including: Loyalty program, Rewards, VIP tiers, Wishlists, Referrals, Gift cards, Product reviews.
All of these features work seamlessly together to help you create a sales-driving store. You can manage everything from a single dashboard, and you don’t need any coding skills.
Growave is built exclusively for Shopify, and it’s trusted by more than 13,000 stores. It also offers multi-language support for cross-border selling, real-time analytics, and 24/7 world-class support.
Key features:
● Reward customers for their loyalty with a loyalty program, VIP tiers, and rewards.
● Get more customers through referrals and save on ad spend.
● Boost sales with wishlists and trigger emails for sales and back-in-stock items.
● Collect photo and product reviews automatically and showcase them on Google search results.
● Showcase Instagram photos and user-generated content (UGC) to build social proof and drive conversions.
Best for:
● Boosting customer loyalty
● Driving conversions
● Increasing customer lifetime value
● Growing sales with wishlists
Pricing:
● Free plan available
● Medium: $49 per month
● Growth: $149 per month
● Premium: $349 per month
5. MultiCarrier Shipping Label
Shopify Rating: 4.8 with 300+ reviews
The Shopify Multi-Carrier Shipping Label app automates all your shipping tasks by displaying exact shipping prices at checkout, printing shipping labels with a single click, requesting carrier pickups, and tracking orders in real-time within your Shopify store. The app is the best if you want to save time and cost. As the name implies, the app supports and is certified by all major carriers: UPS, USPS, FedEx, DHL, Stamps, Aramex, Blue Dart, Australia Post, Canada Post, Purolator, and more enabling you to ship globally. This app saves you from juggling multiple shipping solutions letting you select your preferred shipping services to ship to all domestic and international destinations.
Key features:
● Real-Time Rates: Display live shipping costs at checkout.
● Bulk Label Printing: Generate shipping labels in bulk with a single click.
● Live Order Tracking: Monitor order status in real-time.
● Efficient Shipping Management: Easily schedule pickups and print shipping documents.
Best for:
● Automating Shopify shipping with multiple shipping carriers.
● Save money on shipping costs.
● Speed up label creation and save time.
● Enhance the customer experience with accurate rates and order tracking.
Pricing:
● 14 day free trial
● Starter plan – $9 / month
● Popular plan – $ 29 / month
● Premium plan – $49 / month
● Unlimited plan – $99 / month
6. Etranslate
Shopify rating: 4.9
Etranslate is a multi-currency switcher, multi-language, and translation store that you can directly install into your Shopify admin packed with the most latest themes available.
This great Shopify app has Auto AI translation and multilingual SEO that you can use to translate the contents of your store. It functions in sync with the multiple language translation feature on Shopify.
The Auto Multi-currency Converter is for currency conversion so that you can change your currency into the local currency of your customers. It also supports Shopify checkout and multiple payment currencies.
Additionally, you can incorporate the Language and Currency Switcher feature and convert language and currency automatically to match your customers’ region. That way, they have no language problems when shopping on your website.
Key features:
● Ability to localize your eCommerce business without slowing down your page load time.
● Translate your site’s contents easily into multiple languages.
● Seamless translation of the notification and checkout pages.
● Auto currency conversion.
● Language/Currency switcher that is easy to set.
● Manual and automatic language translation.
● SEO booster that features hreflang tags, sitemaps, easy-to-translate meta tags, alt-text, and description.
Best for:
● Merchants who have eCommerce businesses that deal with the international market.
● Merchants who wish to add 150+ currencies.
Pricing:
● Free Plan is available.
● There is also a free trial for 7 days.
● Basic Plan – $8.99 per month.
● Growth Plan – $16.89 per month.
7. Willdesk
Shopify rating: 5.0
Willdesk is a customer service tool and live chat app that you can install directly on your Shopify platform. It has the latest themes that are customer friendly and unique.
This great app is designed to offer the best customer support from a central point or help desk. You can use the tool to decrease the number of first response time tickets and boost the overall effectiveness of your support team.
The HelpDesk for customer service feature enables you to manage customer support on Live Chat, Facebook, Email, Instagram, and Whatsapp. You can do all these things from one inbox.
There is also 24/7 live chat support that is always available to attend to all your inquiries.
Key features:
● Offer customer support on all channels.
● Provide an order tracking widget so you can track their orders.
● Live chat service that boosts conversions and increases sales.
● Multilingual help center and live chat in English, Spanish, French, Norwegian, Dutch, German, and over 40+ others.
Best for:
● Boosting customer service on all channels.
● Merchants who want to integrate with ParcelPanel and TrackingMore.
Pricing:
● Free
In conclusion
Success in the eCommerce niche isn’t something that occurs by accident. You have to plan and make the right investment for you to attract the right customers and retain them, which directly affects your sales. We have looked at five of the best Shopify apps for boosting sales. Install these on your Shopify Store today and watch your sales numbers skyrocket.

What is a 404 error and How to Fix it
In an ideal world, your Shopify website would be free from all kinds of errors. Visitors would seamlessly navigate your site, and every page would be active and functional. In reality, however, 404 errors are bound to creep up on your site. 404 errors can bring several disadvantages for your business, including lower search rankings and missed sales opportunities. As a Shopify store owner, you need to pay more attention to them in order to keep your business healthy and profitable. What is a 404 error? And how does it affect your SEO and website? Read on to get the answers to these questions and more.
What is a 404 error?
A 404 error occurs when a search engine crawler or visitor requests a page that does not exist on a domain. It can happen because:
The visitor mistyped the website’s URL
- The page was deleted without a 301 redirect
- There’s some fault or broken link in the URL text
- Another site links to an incorrect URL
Here’s what a 404 error looks like:

Besides the standard 404 errors, your pages may get soft 404 errors. A soft 404 error occurs when a non-existent webpage shows a not found message to visitors but returns 200 “OK status” to search crawlers. This causes crawlers to think there’s a page at the URL, but Google has become efficient at detecting these empty pages. So when it sees a page giving a 200 OK” status” when it should actually display a 404 error, it puts a soft 404 error on it and alerts the website owner.
Variations of 404 error
The 404 error message can appear in other forms, depending on the browser of the visitor. Typical forms include:
- The page cannot be found HTTP Error 404
- We can’t find the page you’re looking for
- The requested URL was not found on this server Sorry, the page does not exist. That’s all we know
Do 404 errors impact the organic ranking of a website?
404 errors won’t directly impact your SEO but could lead to a poor user experience. Remember that user experience is a key consideration for Google’s web crawlers, so your organic ranking can suffer with bad 404 error management. The impact can be even greater if an important page on your Shopify site has a 404 error (such as the best-seller page). Potential customers won’t have access to the information they were promised and will be confused about what to do next.
Plus, visitors being frequently redirected to 404 error pages could result in your website being categorized as low-quality or untrustworthy, leading to your conversions taking a hit. Moreover, 404 pages mean you’re passing link juice (SEO equity) to non-functional pages on your site. That’s not going to do you any good; in fact, it may reduce the overall page rank of your website. No one wants that. Consequently, the 404 pages themselves won’t pass link juice. That’s because Google doesn’t assign any of the values passed by links that direct to 404 error pages. But make sure it’s not a permalink issue causing sitewide 404 errors—this will prevent search engines from crawling any of your website’s content.
404 errors can also cause your Shopify store to have:
A high bounce rate: Visitors who come across this page first instantly leave your site.
High exit rate: Visitors who find this page by clicking a link somewhere else on your store immediately exit.
How to find and fix 404 errors
There are several ways you can address 404 errors, but you need to identify them first. This is where Google Search Console comes into play—it provides a list of every 404 error Google’s crawler finds on your website (including the soft 404s). Open the Search Console, then click the Coverage > Excluded tab.
Now you should be able to see a list of errors highlighted as Soft 404 and Not found (404). Open each to find a list of pages with the 404 not found error. When it comes to fixing 404 errors, you can: Restore the page: If the deleted page gets a lot of visitors and you can’t find a suitable page to redirect them to, it’s best to restore the original webpage. Fix the link: For any broken links on your website, simply edit the link and replace them with an active URL.
For external links, contact the relevant website’s owner and ask them to remove the link. Create a custom 404 page: This comes in handy for maintaining your user experience. You can set up a custom 404 page to direct visitors to other door pages on your site. Redirect the 404 error: The easiest and most effective way to fix 404 errors is to redirect users to another relevant page. Use a page that offers value to the user rather than sending them to the homepage. When fixing 404 errors, prioritize the major pages first. For a Shopify store, this can include product pages, pricing pages, and testimonial pages.
How to create 301 redirects in Shopify
When it comes to avoiding broken links, you’ll also want to create a 301 redirect to send the user to a functional webpage.
This requires you to create a permanent URL redirect from the 404 error page link to the new page link. In case you didn’t know, Shopify gives you an option to create 301 redirects automatically. For example, if you have a product page URL “https://myonlinestore/product/jewelry/necklace” and you change it to “https://myonlinestore/product/jewelry/necklace-silver, Shopify will present with a URL redirect checkbox that will be marked by default.
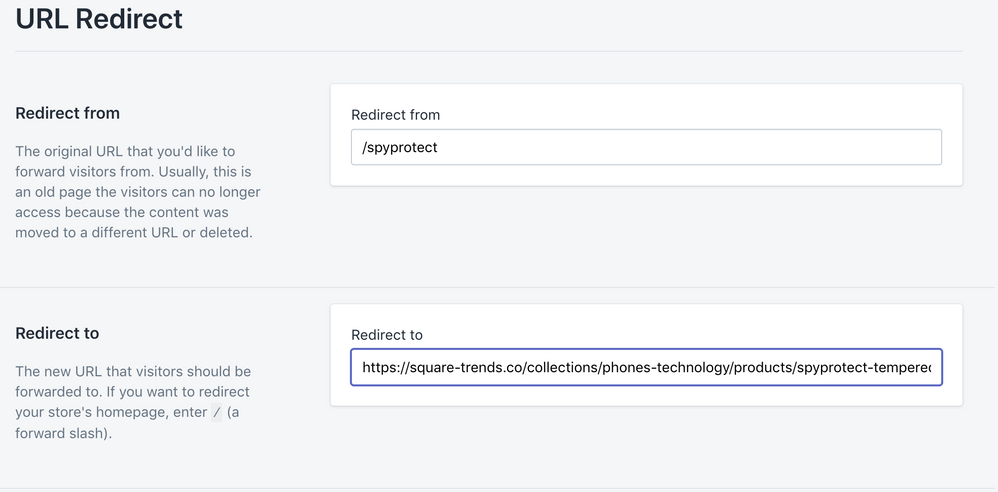
So if you’re updating the URL of the 404 page, don’t remove the checkmark from the box. But in most instances, you’ll need to set up manual redirects in Shopify. Here are the steps to do so: Log into your Shopify account Open the admin panel and click Sales Channels > Online Store > Navigation Select URL Redirects > Create New URL Redirects On the page that appears, enter the broken/old URL in the “Redirect from” box and enter your new URL in the “Redirect to” box.
Use SEOAnt to Fix 404 Errors
If you’re looking for a fast and easy way to address 404 errors, using a Shopify app like SEOAnt is your best bet. The tool has some fascinating features that make life easier for Shopify brands. Here’s how you can install the app on your Shopify store:
Step 1. Log into your Shopify store;
Step 2: Visit SEOAnt’s website and click on our App menu at the top of the screen;
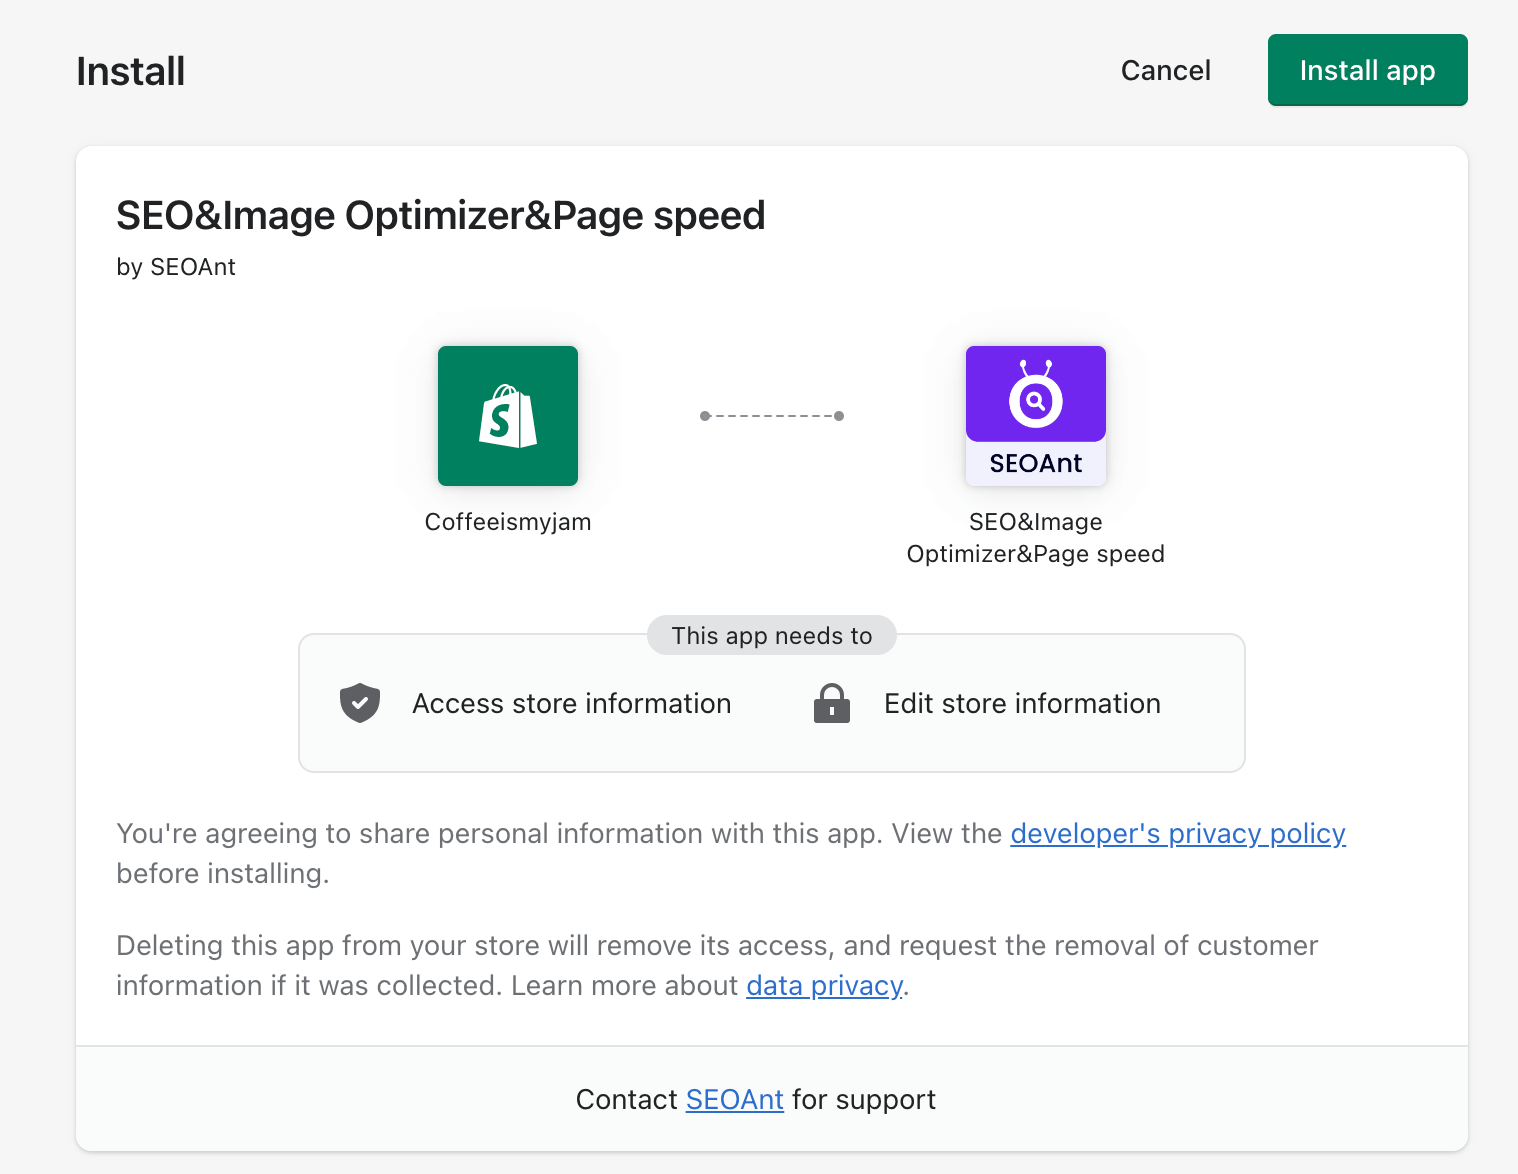
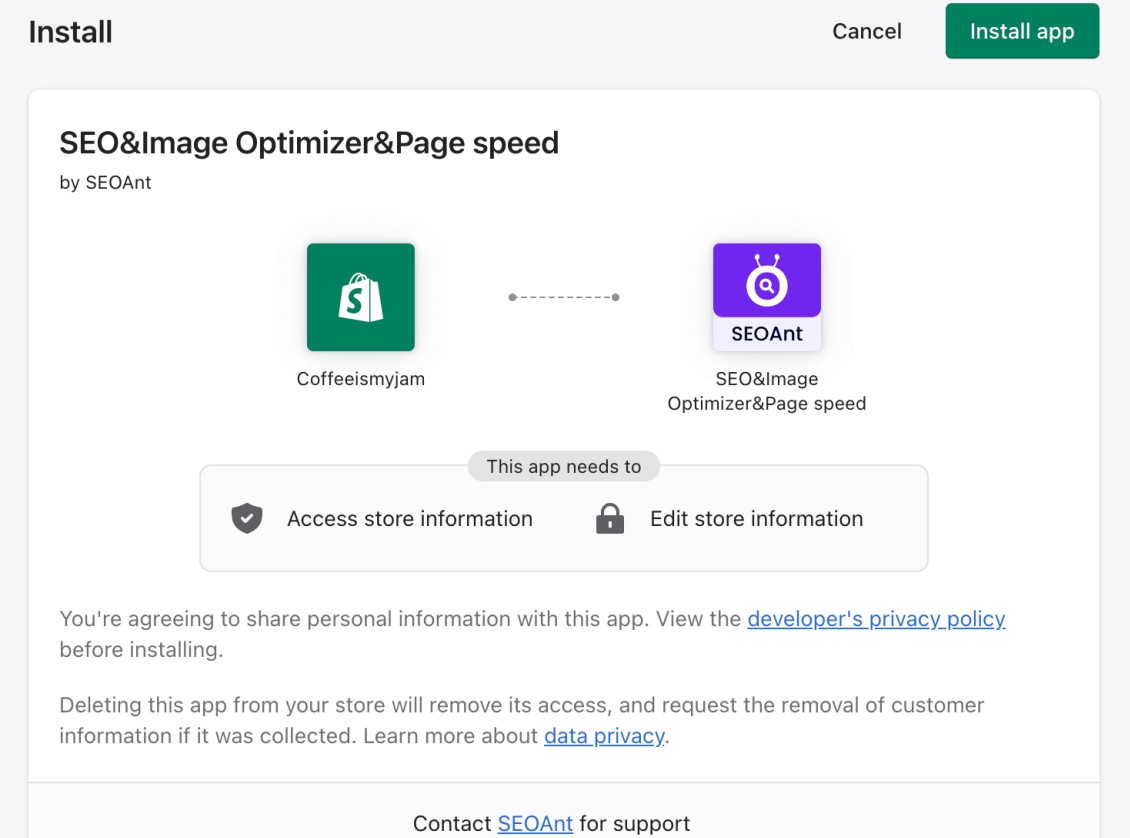
3. Click Add an app on the Shopify App Store page, then click the green Install app button in Shopify admin;
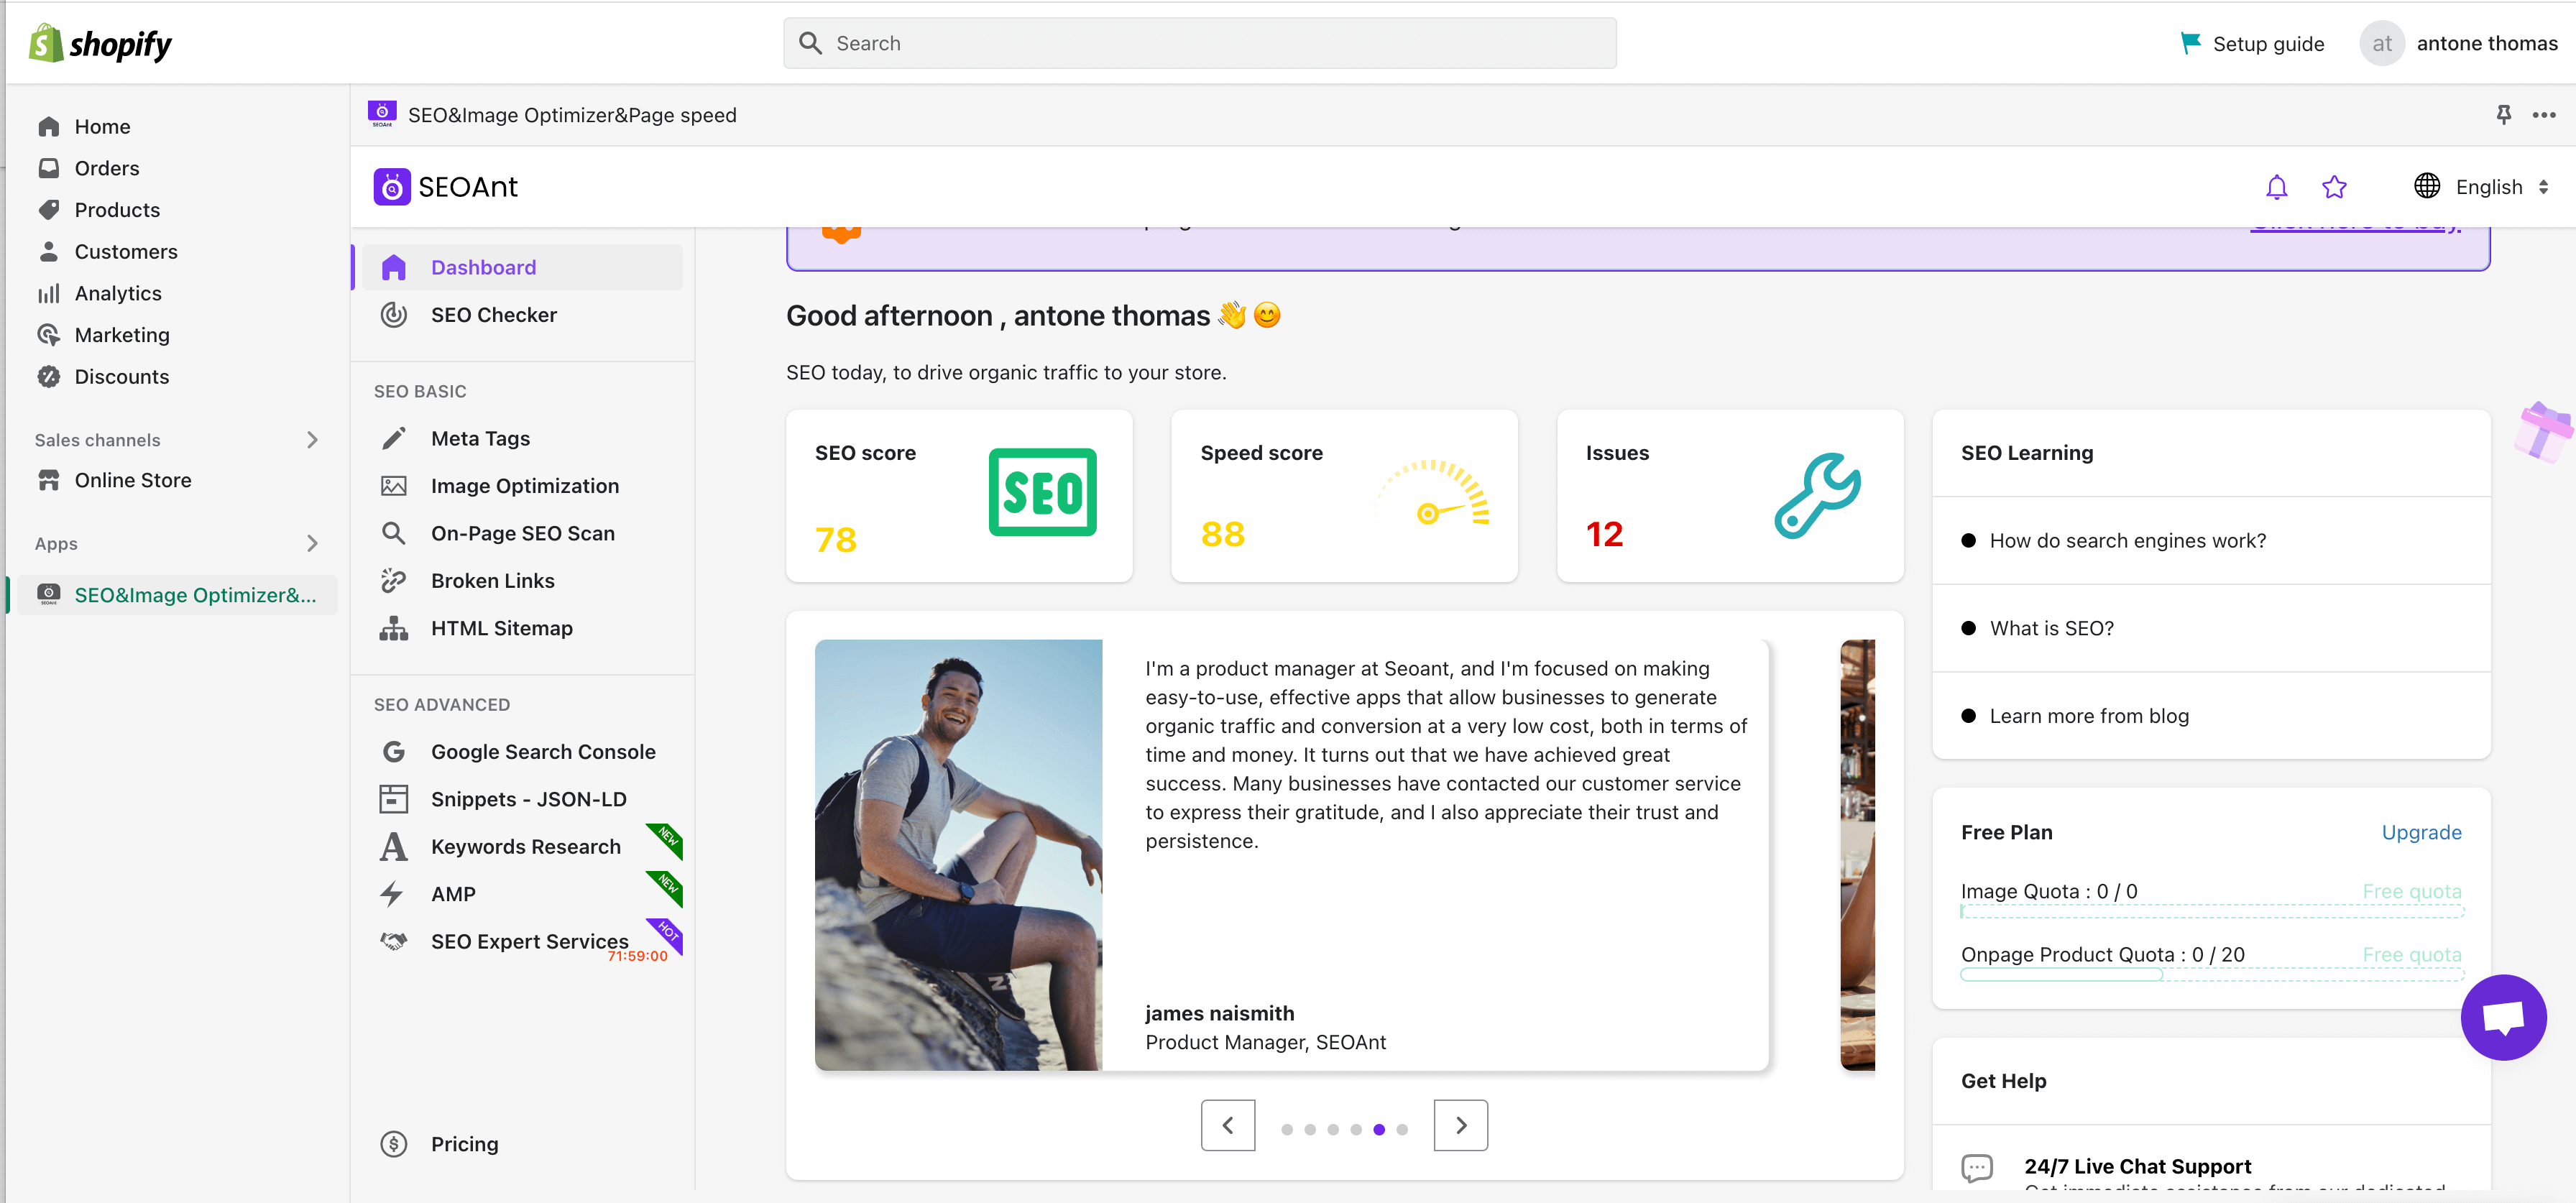
4. In SEOAnt’s dashboard, click the Broken Links tab on the left;
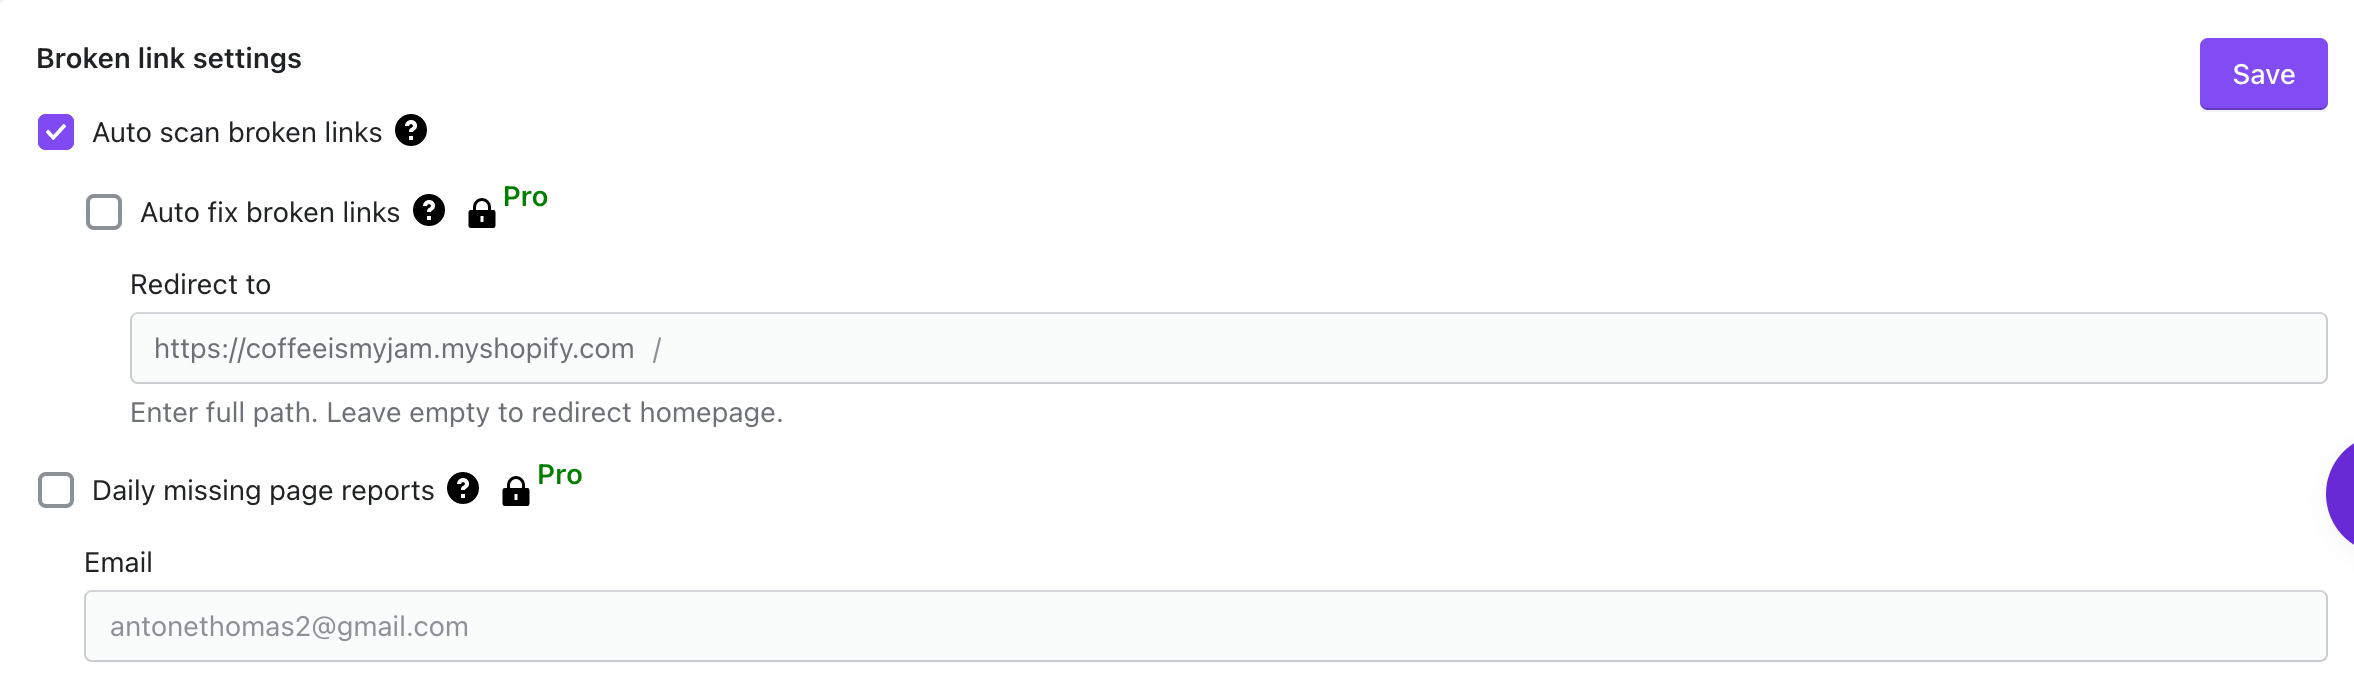
5. Solve the 404 errors and manage any redirects with SEOAnt. You can also configure the app to auto-scan broken links. For auto-fixing these links, you’ll need to sign up for the Pro version of the app.
While you’re solving 404 errors via SEOAnt, make sure to check out other features that can help improve your Shopify store’s SEO. The tool can also optimize images, help you create meta tags, and assist you in fixing your HTML site structure. Think of it as an All-in-One SEO app that helps you solve different issues, including 404 errors.
Conclusion
404 not found pages can reduce your dwell time and increase your bounce rates—two metrics that are critical Google ranking factors. Besides, large Shopify stores with plenty of 404 errors may get completely abandoned by Google. So, prioritize fixing 404 errors if you want your Shopify store to succeed—both in terms of SEO rank and customer satisfaction.

Tips For SEO-friendly Blog Posts
You will be losing out on thousands of potential website visitors if your blog content is not correctly optimized for SEO.
Then why? 93% of all online experiences begin with a search engine query.
It is estimated that Google handles more than 3.5 billion searches per day, making it the world’s largest search engine.
The key to tapping into the unlimited traffic stream is to create content that is SEO-friendly so that you can drive relevant traffic to your site all the time without spending one dime on paid advertising.
We will share step-by-step tips on creating SEO-friendly content in this article and demonstrate how to structure a blog post so search engines notice it.
What do you think?
Continue reading.

What Is SEO-Friendly Content?
Optimized content ranks well on Google and other search engines for relevant and high-traffic keywords.
An SEO-optimized piece of content should have the following qualities:
- Optimized for search engines to understand your target search keywords
- To provide your audience with complete answers to their most common questions, better than any other competitors’
- content written and structured in a way that keeps your readers engaged until the very last word is spoken
- that is aligned with the intent of the searcher
You must create content that answers the most common questions that people have on the topic of email marketing, for example, if your target keyword is “email marketing services.”. It needs to be more comprehensive and in-depth than what’s ranking for that keyword currently.
You should answer your readers’ questions. Why? Don’t you think you could just “stuff” your content with keywords to outrank your competition?
Undoubtedly, Google has become much smarter over the years and has a much more comprehensive array of factors to evaluate content quality, including more than 200 factors.
The essential question remains: “Does a page provide the information users are looking for?”
When Google receives a yes answer, its rankings are elevated. In that case, the page wanders through the Google search results on the back pages.
Step-by-step Tips on Creating SEO-Friendly Blog Posts
Following your initial understanding of SEO-friendly content, let’s examine how such content should be created.
The steps in the process are as follows.

Step 1: Research blog posts’ keywords
Using the right keywords will help you drive traffic from search engines.
Finding those keywords is called keyword research. Your audience uses search engines to find answers to their questions, so this tool aids in identifying the search keywords they use.
The best quality content won’t drive search traffic if the keywords in your content are irrelevant.
What makes a good search term?
- Your core business is directly affected by them.
- They receive a large volume of monthly searches.
- Your competitors target them as well.
- You can’t outrank them because they lack big brands and high-authority sites.
- You’re targeting the right audience.
What is the best way to find keywords?
As a blogger, conducting keyword research for blog posts is important, starting with a competitor analysis. From there, you can conduct consumer research, analysis of search trends, analysis of the commercial value of keywords, analysis of keyword sentiment, and analysis of the overall competitiveness.
Several SEO tools are available in the market, like Ahref, Semrush, Ubersuggest, etc. It gives you all the information needed to choose keywords for your content by automating your keyword research.
By researching keywords, you can come up with ideas for blog posts aimed at beginners, intermediates, and advanced audiences.
Accurate keyword research will make a substantial difference in the success or failure of your SEO strategy. Don’t rush to do it the wrong way or use an SEO platform or professional that is experienced with this.

Step 2: Analyzing Search Intent
When creating content, you need to consider your target audience’s search intent when choosing a keyword.
It doesn’t matter how well-written and SEO-optimized your blog post is for a given keyword, and Google will not rank you if it does not match the intent of the search.
How does search intent work? A keyword is Google’s interpretation of what people are searching for when looking for a keyword.
Is it the brand name or fruit someone searches for when searching “apple?”?
Are people searching for “email marketing” to find out what it means, the best email marketing tools, or where to find email marketing services?
Before you write content on a target keyword, it’s helpful to study the search intent. Google search and examining the top ten search results are the fastest and easiest ways to do this. According to Google, a top-ranking page’s format, topic, and structure match the search intent for the target keyword.
Use the same content angles and learn from their approach.
Step 3: Establishing Content Benchmarks
Your keyword is right, and you know what people are searching for.
Your content needs to be created.
What guidelines should you follow for writing content? What is the best length, structure, or linking strategy?
Analyzing your competitors will help you determine your content benchmarks. The top ten results should open in separate tabs once you have searched for your target keyword.
Each result should be noted for the following reasons:
- Total number of words
- The most significant keywords in the introduction and subheadings
- How many images are used when creating the content
- How many external and internal links are used
- Does the content use any data, case studies, or examples?
It’s now easy for you.
You need to create significantly better content than your competitors’ content. As an example, if the top 10 search engine results have an average content length of 1,500 words, your content should be at least 3,000 words long. Also, if you want to outdo your competition, use more screenshots, data references, and examples than they do.
The reason why? This will allow you to provide your content with more depth and comprehensive coverage than your competitors, and you will be able to stand out from the competition.
In this way, you may be able to rank higher in the search engine results for the keyword you are targeting.

Step 4: Make the First Draft of Your Blog
The next step is to write pieces that readers will be interested in reading.
You ought to set aside SEO at this point and focus instead on providing informative content that will answer your audience’s questions better than your competitors. Try focusing on one or two specific questions that your audience has in mind when writing your articles. Keep your content simple and straightforward to read; you will be able to read and understand it easily.
Proceed to the next step once your draft is complete.
You can use this template to create content faster.
Step 5: Making your content SEO-friendly
The next step is to optimize the content for SEO.
Optimizing your content for SEO begins with ensuring it answers the audience’s main questions.
Optimizing such content with the target keyword and its closely related variations is important once you have created it. It’s a good idea to use your keyword and the variations thereof in the following areas:
- Title tags, meta descriptions, and URLs should appear early on in the search engine results
- Pages under the main H1 tag
- As soon as possible, once your post has reached 100 words in length
- Make sure that you use the H2 and H3 tags to segment your text into three subheadings
- Make sure you use alt text as part of the image content within your content.
- That you use throughout the body of your article
- For your internal links to be effective
- At the end of your article, you can include a final paragraph
Tips:
- In the results of your Google search, look at the “People Also Ask” section on the right side of the page and copy the top ten questions.
- Listed at the end of your page, you should include an FAQ section, where you can list all of the questions you copied in the previous step, along with a short answer to each question.
You’ve successfully optimized your content for search engine optimization.
Alt Text: What Is It and How Does Impact Your SEO?
Did you know that over 40% of Google’s SERPs display images? That’s right—images are a major source of content for search engine users. They make pages easier to read, help in explaining a subject better, and are visually more attractive. But to make the most of your images, you need to make them accessible. And the best way to do that? Using alt text.
Incorporating alt text into your images, such as product photos, can drive more visitors to your eCommerce store. Offering a textual alternative to your images helps those visually impaired interpret your images via screen readers. Properly formatted alt text also contributes to how search engine crawlers index and rank a website.
In this post, we’ll tell you everything you need to know about image alt text. You’ll learn about its definition, importance, creation steps, and much more.
How important is alt text?
Alt text is a vital component of website accessibility. It provides a source for text-to-speech readers to read from, allowing blind or visually impaired users to conveniently and effectively use any website. It also provides an alternative for the webpage to display in case of a connection issue or malfunction. As a facet of creating a more accessible online world, alt text is vital, but it also aids in a website’s online presence as an SEO tool.
Alt text and SEO
Descriptive alt text allows search engines such as Google to read images as text, adding it to the repertoire of data on hand. By providing accurate and concise alt text, search engines will use it to further connect the site to its list of results in a given search.
For example, a site intended for selling computer parts will benefit from providing both images of those parts are comprehensive alt text. For each image, the alt text will cover the complete specifications of the parts shown. This will double the amount of relevant text that will be read by search engines on that page, improving its chances of being shown higher in the results list.
Since Google algorithms can only read the basic information of an image – i.e., a red car in the style of an SUV – it cannot include that image in a series of results regarding a search for Volkswagen cars. The addition of alt text describing the car – “red car, 2022 Volkswagen T-Cross” – will then include the image and any other text on the webpage.
Alt text and Image Search SEO
As you optimize for Image Search, make sure to help photos to appear in return for text-based queries. This requires you to follow best practices such as:
· Relevant file names
· Schema markup
· Alt text
These elements help search engines understand your images better and produce a relevant image search result. Remember that search crawlers like Googlebot can’t view images on a webpage like human visitors can so avoid leading the interpretation to them.
For instance, Google might come across the following image and decipher that it’s a suited man slapping another man someplace.
But if you’re trying to rank for “Will Smith slaps Chris Rock at the Oscars,” you’ll need to provide a clue to the search engines.
Alt text and user experience
Alt text not only improves the user experience for people with disabilities; it helps website owners deliver a better UX to everyone. For example, if a visitor is using low-speed internet, all the images on your storefront may fail to load. In this case, the person will also see the alt text along with the broken link icon, allowing them to understand what the photo wanted to convey.
Likewise, a website visitor might be able to view an image on the left. But if a bandwidth issue, disability, or another problem prevents them from doing so, then they will see or hear alt text on the right. This will result in a better user experience than if there was no alt text.
How do I write good alt text?

1. Use specific descriptions – As each image on a site is intended to convey a specific meaning, its alt text must be as specific as possible. For a user who is blind or visually impaired, seeing the image is not an option. Therefore, the more the image is conveyed through its alt image, the better the user can “see” it. In the case of decorative images (ones that do not serve a purpose beyond aesthetics), alt text need not be as accurate.
2. One hundred twenty-five characters or fewer – while this is no longer an exact rule, many programmers still use it. Due to processing limitations, older screen readers used 125 characters as a hard limit. However, it is still an unofficial rule today, especially by content creators and for SEO.
3. Use keywords often – where relevant, using keywords in the alt text will add another layer of SEO to a webpage. This is best done by casually integrating them into the image description, keeping them relevant to the image, and not just shoehorning them in.
4. Don’t overuse keywords – most search engine algorithms can tell when keywords are used senselessly – otherwise known as “keyword stuffing.” Ensure all alt text is relevant to the image and not just a string of SEO keywords, as these results might be removed from search engine results. Keep all alt text natural and descriptive without drowning it in keywords.
5. Avoid using images for text – Search engines cannot read the words on images like they do text. Therefore, avoid using images that contain words to describe a product or idea. If any images on a site do contain words, it is best to include these in the alt text if they are needed as part of SEO.
6. Only use descriptions – alt text does not need phrases such as “picture of” or “image of” within. As it is already describing an image, adding this only wastes the number of characters available. Stick to descriptive words only without superfluous content.
7. Check the best practices for complex images – more complex images need more description, so follow the best practices outlined. This will ensure all pertinent information is conveyed for the voice-to-speech software, keeping the image relevant and useful.
8. Don’t forget form buttons – including alt text for form buttons such as “sign up” or “log in” will add them to the reader’s list. If they don’t have alt text, they won’t be read, so every one of them must be included to provide greater accessibility for those that need it.
9. Leave out the unnecessary things – Some things are best to leave out when writing an alt text for your image. These include multiple punctuation marks, overly detailed or poetic descriptions, and emojis.

Bad alt text: Man using Airports.
Better alt text: Man in a black shirt using Airpods.
Best alt text: Man in a black shirt using Airpods to answer a call.
Bad alt text: Man ordering McDonald’s.

Better alt text: Man ordering McDonald’s on a smartphone.
Best alt text: Man ordering a Mcdonald’s Veggie McChicken Burger on a smartphone.
Editing image alt text on your Shopify Store

Is your Shopify store full of images that don’t include alt text? Adding them manually is likely to eat several hours of your time. So, it’s best to use an app like SEOAnt to automate the process.
SEOAnt automatically edits your image alt text based on the template you choose, improving your SEO and user experience. This saves you from having to open every photo and write an alt text for it from scratch.
Steps to use SEOAnt to Edit Image Alt Text
1. Log in to your Shopify administrator account.
2. Open SEOAnt’s website and select Our APP from the top menu.
3. On the page that appears, click Add an app.
4. In the Shopify admin, click the green “Install app” button to proceed.
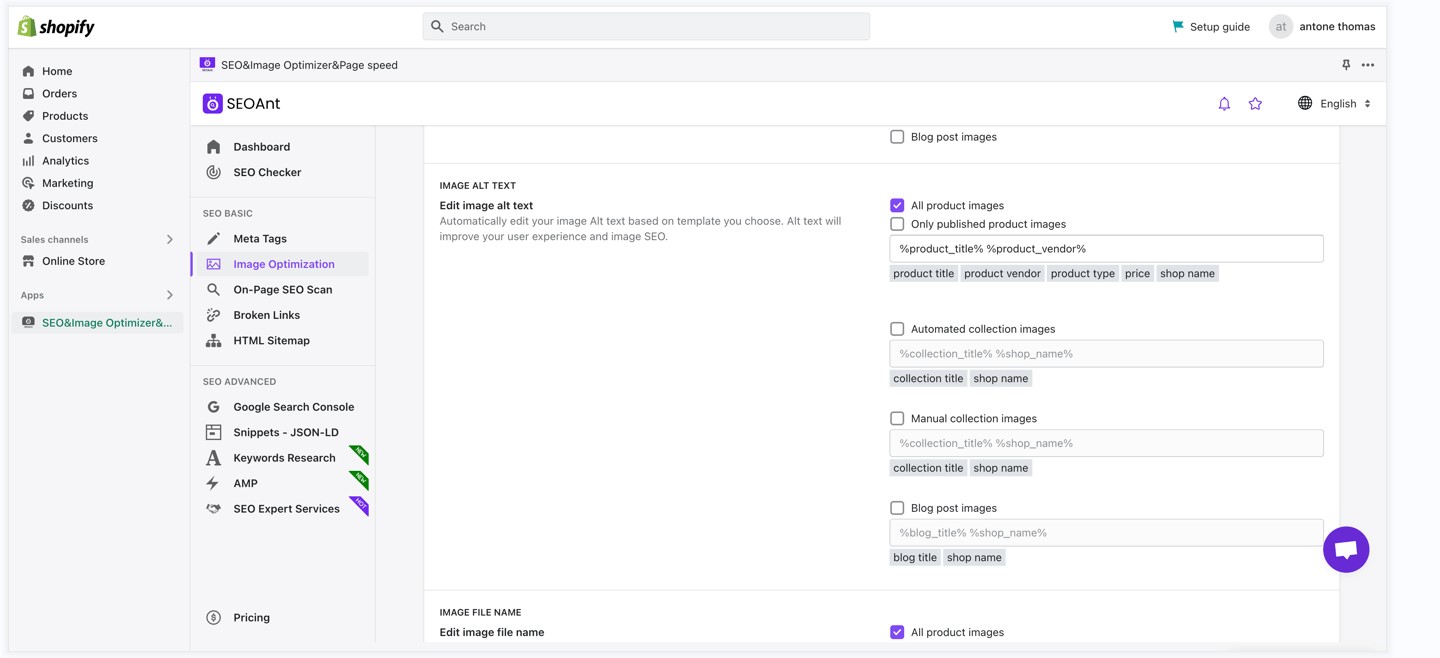
5. Finally, select Image Optimization in SEOAnt’s dashboard, scroll down to the IMAGE ALT TEXT section, and check the box for all product images.
Note: SEOAnt lets you choose whether you want to optimize all or only published product images. Choose the option that suits your needs best.
Conclusion
Alt text is an afterthought for most eCommerce businesses, but it’s time you start paying attention to it, so you don’t miss out on the benefits of organic visits via Image Search. Use the tips and strategies mentioned above to create your alt text, and you should experience a decent uplift in overall ranking and traffic.
3 Ways to add an Add to Cart button on your Shopify store
Do you remember how you can just walk into a supermarket, pick an item that tickles your fancy or make your shopping list and throw it into your shopping cart? Yes, that ease of choosing all your preferred products without forgetting any is exactly what online shoppers need while going through your Shopify store too.
But how do you even add this “add to cart” functionality to your Shopify store? And how can you customize it to fit your brand visual styling or push for sales with features like a countdown timer, or out-of-stock reminder? Keep reading and follow through gently!
What is a Shopify Add to Cart button?
The Add to cart button is an essential e-commerce shopping tool that enables shoppers with purchasing intentions to get an item into their online cart with just a tap.
This button is usually placed on your product pages, collection pages and cart pages for the customers’ shopping comfort. Your customers and page visitors can choose an item for purchase without paying for it yet. Thus, they get to continue their shopping journey without being led to a checkout page for each item they are interested in buying.
The Add to cart button provides your store visitors and customers with a smooth and stressless shopping experience. It also helps you to rake in multiple product sales as opposed to a one-time off-product added to a cart.
How does the Add to Cart button help increase your Shopify sales and conversions?
There are many ways that a properly designed cart button can help you sell big. Check below.
- Enhance customer confidence
How? It simply tells customers that they don’t need to go over multiple single-product checkout pages when shopping in your store.
When your customers are aware of this guaranteed seamless shopping process, they tend to buy more confidently, which directly boosts your store sales.
- Store customers’ information and help you retarget
Whenever your customers add a product to their carts, your website stores it in its system database for a prolonged period until they choose otherwise.
Even if they leave the cart unattended for days, weeks, or months, no worries, you can still track them down and convert them with emails, special offers, etc.
Also, your customers can rest assured that the product of their choice is still lying in wait for checkout.
- Manage customer orders in the neatest possible way
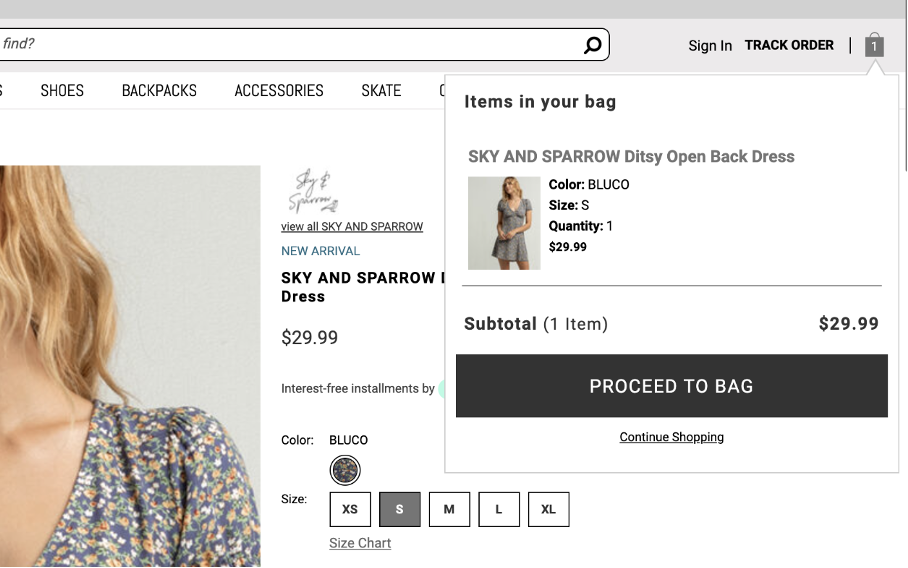
It displays all necessary details of the selected products on one page for your user’s view such as the product variant, color, size, quantity, price, etc.
This way, the customers can always see all they need to know about their products of interest without visiting the checkout page. They are liable to trust you more if they see how well your store manages their products and carted products. And this influences their purchasing decisions positively.
How to add an Add to Cart Button on Shopify?
Never forget your main goal with the Add to Cart button is to ease your customers’ shopping experience and make it feel like a real-time shopping. There are three ways to add it to your Shopify store.
- Via Shopify’s built-in buttons
This is one of the easiest ways to add a Cart button in your store. Check out the steps below.
- Visit the Shopify admin section and tap the Buttons option.
- Then, choose the Add button option.
- On the drop-down menu that displays next, choose the Add to cart option on it.
Pros
- Super easy to use
- No prior or technical knowledge is required to get the work done.
Cons
- It isn’t easily adjustable to fit the natural feel and presentation of various online stores. Therefore, it can disrupt the brand consistency if used for this purpose.
- You may not be able to add your own customizations.
Just as an Add to cart button can boost your store conversions, it can also chase your prospects away if it isn’t really adding value to the customers shopping experience on your webpages.
Poorly added and non-effective Add to cart buttons can make your customer abandon their carts more than ever. Hence, you must monitor the conversions and abandonment rate of the Add to cart button you add to your store.
Or better, use a professional Sticky Add to Cart app which helps you personalize your cart design and messages.
- Customise your Add to Cart Button via a third-party app
If you want your Add to Cart button to have a more unique style, then using professional Shopify Add to Cart apps is a fitting solution. Take the SEOAnt Sticky Add to Cart app for instance. This app allows you to customize the font, colour, styling of your Add to Cart button for both laptop and mobile views.
You can also decide which page that button leads. Besides, you can even add extra features on your products such as countdown, out-of-stock reminders, brand promo messages and animation effects to help users convert!
Steps
- Install Sticky Add to Cart app to your Shopify store.
- Start customizing the text, design, size, animations and other details of your carts, on both laptop and mobile views.
- Click Save.
Pros
- Easy to use and customize the cart design
- Multiple cart types to select from
- It offers both free and paid plans. Both offer the same benefits to users. Paid one starts at merely $4.99 a month
- Manually add the code of Add to Cart button into your theme.liquid file
You can also add the Add to cart button to your store via the theme.liquid file. This requires certain knowledge of coding. Follow these steps closely.
Steps
- Go to your Shopify admin page and choose the Themes option.
- From there, tap the Actions button.
- Then, choose the Edit code option.
- Afterwards, choose the corresponding file for the page you want your Add to cart button on.
- Then copy and paste this code
- <form method=”post” action=”/cart/add”>
- <input type=”hidden” name=”id” value=”{{ product.variants.first.id }}” />
- <input min=”1″ type=”number” id=”quantity” name=”quantity” value=”1″/>
- <input type=”submit” value=”Add to cart” class=”btn” />
- </form>
- Tap the Preview button to see if the changes have taken effect appropriately.
- Then tap the Save button to complete the process.
Pros
- It allows you to keep your brand consistency as you can choose the fitting style and look of the Add to cart button for your store.
Cons
- It takes more time than other methods.
- It also requires a good knowledge of coding to work perfectly.
Pro tip
Whenever you are using this method to add your Add to cart button, you must first duplicate your theme to avoid losing the first and unedited version of it before use. Follow the steps below to duplicate your theme.
Steps
- Go to your Shopify admin page and tap the Online store button.
- Then proceed to tapping the Themes button.
- On the theme you plan on duplicating, tap the … button.
- On the displayed action menu, choose the Duplicate button.
Note that the duplicated theme would be titled like this “Copy of + the duplicated theme’s name”.
Key considerations in creating an Add to Cart button on Shopify?
Paying attention to the tips below in your Cart design, you can reap further benefits to your store. Take a look!
- Mobile optimisation
In 2022 Q2, 58.99% of website traffic was from mobile devices. And it is predicted that by 2024, 42.9% of e-commerce purchases would be completed on mobile devices. This means that optimising the mobile shopping experience for your store customers is highly profitable and promising. Therefore, it must be taken with great dedication to boost sales through mobile optimisation.
To avoid cart abandonment, you must improve the functionality and overall responsiveness of your Add to Cart for your page visitors’ convenience on mobile phones. Things like the page response speed, the screen sizes, site designs, text legibility, pop-ups removal, and button clickability must be mobile-optimized. This way, you get to keep your smartphone-using customers glued to your store and improve sales indirectly.
- Brand consistency
The Add to cart button, especially for mobile phone users, should also agree with your specific brand messaging features. This way, you can create and maintain a unique style of messaging and communication with your customers and page visitors.
Therefore, always choose a cart design that primarily fits into your existing brand messaging e.g the page typography, the themes and page colors, the page image quality, etc. This way, you get to maintain a continuous rate of page engagements, usability and conversions.
- Customer intent
Remember this is more about your customers than you. So, whenever you plan on adding an Add to cart button, think of what your page visitors or customers may want to do in your store. You can add different details to accompany your Add to cart button to avoid spamming them with sales messages right on spot.
Some examples include showing the benefits of the product, or adding a review to the product page, or a persuasive product description. When customers feel more informed about a product, they can easily trust its value propositions.
You can always try these methods out differently, monitor their performances on your customers and page visitors. And then go on to stick with the one with the highest conversion rate.
FAQs
- What is a good add to cart rate on Shopify?
According to XPSquared, a good add to cart rate on Shopify is usually determined by the industry a store belongs to. For example, if your store is in the food and beverage industry, the average add to cart rate is 13.47%.
But the overall average add to cart rate on Shopify was 4.6% in September, 2022. And having a 7.5% or higher add to cart rate makes your store qualified among the best 20% of Shopify stores. Hence, the provided range of a good add to cart rate on Shopify is 2.3% to 7.5%.
- Why can’t I see the Add to Cart button on Shopify?
Your Add to cart button may not be showing for peculiar reasons in your stores, such as theme customisation error, or Add to Cart button missing on every product page or some product pages. It’s best that you consult a professional expert about it.
- How long does a Shopify cart hold products?
Shopify automatically removes all added products in the cart by the end of your checkout process. But if the cart is unused, Shopify’s algorithm automatically deletes the abandoned cart after 10 days of creation.
- Can I hide my Add to cart button on Shopify?
Yes, you can. Just follow these steps here to get it done for your mobiles and/or laptops.

What is Shopify AMP and How to Create AMP pages?
You are browsing a page on the phone, and it takes really long to load, what would you want to do? Directly bounce, right?
Now imagine the same for your prospects who are viewing(or trying to) your site. Wouldn’t it be concerning if they quickly leave and you risk losing sales every day?
Worse still, they are more likely to bounce when using a mobile phone.
But, the good news is that with Shopify AMP, you can start delivering lightning-fast and smooth browsing experiences to your mobile customers. Let’s get right into it!
What is AMP in Shopify?
AMP, standing for Accelerated Mobile Pages, is an open-source project developed by Google to improve the performance of web pages on mobile devices. It works by stripping down all the extra code from your web page and loads just the essentials.
You can consider it as an optimized lightweight version (while retaining the old) of the original web page. According to Google Canada, AMP pages generally load 4 times faster than non-AMP pages, using 10 times less data. That’s why many top websites, such as geeksforgeeks.org, freecodecamp.org, g1.globo.com, Dailymail.co.uk, etc., have adopted AMP, demonstrating its widespread adoption and effectiveness.
AMP pages typically include the “amp” reference in the URLs, for example “www.example.com/page.amp.html“. Meanwhile the original page still exists and can be accessed through its standard URL “www.example.com/page.html“.
You can also easily recognize an AMP page by the lightning bolt icon that appears alongside the link in the search results. This icon boosts click-through rates by catching the eye and driving more traffic to your AMP pages. Have a look at the example below:

AMP pages can sometimes be featured as a rich result in Google Search, and in the Google Discover feed. The rich results can draw more attention and drive more organic traffic to the website, leading to increased brand awareness and potential sales.
Benefits of adding AMP pages on Shopify?
Today, speed is a crucial factor in visibility and user engagement, especially considering Google’s mobile-first indexing. While AMP is no longer a direct ranking factor, it can still provide Shopify stores with a better UX for their mobile customers, improve their website speed, and potentially improve their search engine visibility. Here are some other specific benefits:
- Faster page load times
AMP pages follow strict technical guidelines to ensure the quick rendering of pages for faster loading on mobile devices. Here is how it achieves this:.
- HTML restrictions: A subset of HTML called AMP HTML, has restrictions on certain HTML tags and attributes. This reduces the size of the HTML code to be loaded and speeds up the parsing and rendering of the page.
- JavaScript restrictions: The amount of JavaScript that can be used on an AMP page is restricted to 50 KB. This ensures that the page remains fast and interactive.
- File size restrictions: AMP pages are kept under a certain size, with images, videos, and other assets optimized for fast loading. For example, they’re restricted to using images that are no larger than 1 MB in size.
- Third-party plugins restrictions: Third-party embeds like social media widgets, video players, and other integrations are loaded asynchronously. That is, they’re loaded in the background, after the main content of the page has loaded. This ensures that they do not drag down the page’s speed.
- Lazy-loading: AMP pages defer the loading of images and other resources until they are needed. This reduces the amount of data that needs to be downloaded up front.
- Prerendering via a CDN: They’re pre-rendered in search results, meaning that the content of the page is fetched and stored by Google ahead of time. This allows the page to load instantly when a user clicks on it in the search results. The pre-rendering process is handled by the AMP cache, which acts as a content delivery network for AMP pages.
- Increased Mobile Conversion Rates
AMP prioritizes the content that is most important to display the page correctly, such as text and layout, so the user does not have to wait for the page to become ‘stable’. AMP’s ability to preload content is also key for mobile users with limited data plans and slower network speeds. This instant loading leads to a reduction in bounce rates, as users are less likely to leave the page.
How to enable AMP on Shopify?
You can’t just enable AMP on your Shopify store at the snap of a finger. Instead, you can utilize the help of a professional AMP app. Take the SEO & Image Optimizer of SEOAnt by example. Here is how you can easily create and publish AMP pages with it:
- Install the SEO & Image Optimizer app on your store.
- Go to dashboard, and select AMP.
- Choose the page that you want to “Amplify”. Start customizing the theme, header, body, footer, meta, and other details for the AMP page.
- Preview the changes. Once done, click Save.
Limitations of AMP Pages
AMP can speed up page loading time, reducing bounce rates and increasing conversions. However, it may not be suitable for pages with complex functionalities because it does the following:
- Limits functionality of certain elements: Elements such as animations, videos, customization, and dynamic features might not work properly as they require more complex coding and functionality, which AMP does not support.
- Requires additional development time and resources: The process of converting HTML pages to AMP pages involves reducing the code, making it more streamlined. You need to keep it up-to-date and ensure that all your page code is properly formatted and optimized. Pages that do not follow AMP specifications may not render correctly on mobile devices. If your company is already stretched thin on resources, it can be quite a challenge.
- Lack of flexibility: AMP pages are made to be lightweight, with limited functionality and streamlined code. This can make it difficult to add new features or make changes to the existing design.
Given the limitations of AMP pages, it’s important to carefully consider which pages to enable AMP on. Hence the following guidelines.
What Pages Should I Enable AMP on?
Generally speaking, AMP works best for content-rich pages such as blogs, news articles, and product reviews, where speed and simplicity are the main priorities. For complex pages such as e-commerce checkout or user profiles, it may not be suitable due to its restrictions on custom HTML and CSS. Check below to know what pages you should consider AMPlifying.
- Blog Posts: Blog posts can drive organic traffic to your Shopify store, while showcasing your brand’s expertise. They provide valuable information to potential buyers, and are often shared on social media. It’s important that they load quickly to serve your mobile customers.
- Product Pages: Product pages matter the most to your business as your main source for traffic and conversions. In case of a simple page design, enabling AMP can be beneficial.
However, if your product pages are quite interactive, say, with loads of dynamic product images, product zoom, etc., enabling AMP might be a bad idea because it will limit their functionalities. Ultimately, it is up to you to decide whether the benefits of AMP outweigh the limitations .
- Collection Pages: Enabling AMP on collection pages will encourage buyers to stay longer and explore more products. However, if there are complex customizations on your collection pages, the AMP version may not appear appealing, which could even lower your user engagement.
- Homepage: Your homepage is like a virtual storefront, and it’s critical that it makes a strong first impression. With AMP, your homepage will load quickly on mobile devices, providing a smooth and seamless browsing experience
But remember AMP’s limitations on interactive elements. Consider enabling AMP on your homepage only if it has a minimalistic design with few plugins.
- Landing pages: These are designed to convert visitors into customers. If yours loads slowly, you risk losing potential customers before they even see your offer. But with AMP, they will load quickly and provide a smooth user experience. This can increase conversion rates and sales.
In summary, the pages that you should enable AMP on will depend on your store’s unique needs. However, a good rule of thumb is to enable AMP on any page that is accessed frequently from search engines and social media. Those pages are critical for conversion.
How to Test if my AMP Pages are Working
Testing AMP pages is important because it ensures that the pages are able to deliver the desired fast and optimized mobile experience to users. Testing also helps you identify any issues with page functionality, broken links, and missing tags that could affect the AMP page’s performance. Here are simple ways to go about this:
To Test if your AMP pages are working properly:
- Use the AMP validator: The AMP validator checks AMP pages for errors like AMP HTML tag and attribute errors, style and layout errors, templating errors, etc. The validator ensures they’re valid AMP pages. Simply enter the URL of your AMP page into the validator, and it will tell you if there are any issues that need to be fixed.
- Check Google Search Console: You can check the Search Console to see if Google has discovered any AMP errors on your site. If there are any issues, you will see them listed in the “Search Appearance” section of the console.
- Test the page speed on mobile devices: You can use tools like Google’s PageSpeed Insights or the Lighthouse browser extension to test the speed of your AMP pages on mobile devices. This will tell how quickly your pages are loading and if there are any issues to be addressed.
To Test if Your AMP Pages are Working Well
1. Check browser’s developer console: AMP pages have special tags and schema that make them different from regular pages. Examples of such tags are:
- A top-level <html ⚡> or <html amp> tag.
- <amp-img> tag for images
- <amp-video> tag for videos
- <amp-accordion> tag for accordions, among others.
2. Test click-through rate: Once you have implemented AMP, you can also test its effectiveness by measuring your click-through rate. You can do this by dividing your clicks by impressions (the times people view your page) and multiplying the result by 100. For example, if you had 350 clicks and 4,000 impressions, then your clickthrough rate is 8.75%
With AMP, it’s expected that the click-through rate will get higher. That’s what the lightning bolt icon indicating the AMP version of the page means.
3. Test with Google’s Mobile-Friendly Test: Google’s Mobile-Friendly Test can quickly tell if your page is mobile-friendly and also test if it’s AMP pages. It checks if the page is properly structured and if it meets the requirements for AMP.
4. Test with Google Analytics: You can track and see the performance of your AMP pages in terms of bounce rate, session duration etc compared to non-AMP pages.
5. Test with A/B testing: This is the comparison between two versions of a page to see which one performs better in terms of user engagement and conversion rate. A/B testing with AMP will determine how effective your switch to AMP has been. This information can then be used to further optimize your website and maybe lead to an increase in sales.
What’s not Allowed in AMP?
Before migrating your page to AMP, it’s important to check that it’s still aligned with your business goals and strategy. This is because AMP limits some key functionalities on a website like some 3rd-party Java scripts, interactive elements, analytics tracking, etc. Here are some:
- Restrictions on HTML and JavaScript
AMP has some restrictions on the types of HTML and javascript elements that can be used on a page. Some elements like forms and 3rd party scripts are not allowed in AMP, because they can slow down your page loading times and affect the user experience.
Some other examples of elements not allowed in AMP include:
- Scripts that block rendering
- Video and audio embeds that require non-AMP plugins
- Custom fonts
- Custom javascript
- Styling that is not done in AMP-compliant ways, such as using CSS styles
- Some types of forms, like those that use post actions, file uploads and input types like date pickers, etc
- Custom JavaScript
AMP does not allow custom JavaScript because it makes pages load sluggishly. Instead, AMP provides a set of custom JavaScript components that can be used to add functionality to your pages.
3. Cross-origin resource sharing (CORS)
AMP requires that all resources on the page, such as images and scripts, come from the same origin. This means that resources cannot be served from a different domain, even if the domain is trusted.
4. Styling
When using AMP, there are rules we have to follow for how the page looks. For example, we can’t mix different styles together, and instead need to put all the styles in one place. Doing it the other way around might make it load slowly.
5. Ads and tracking
AMPs are restricted on certain ads and tracking. For example, ads can only be put in certain spots and tracking has to be done in a specific way.
FAQ
- Do I still need AMP if my Shopify website is fast enough?
Even if your website is already fast, AMP provides additional benefits like improved visibility and optimized mobile user experience.
- Does Google care about AMP?
According to Google Search Central, speed is a ranking factor, not AMP. So pages that load faster, regardless of whether they use AMP technology or not, will have an advantage in search results. However, AMP pages are designed to load quickly, so implementing AMP can improve website speed and potentially improve search rankings.
- Can I track the performance of my AMP pages?
To view your AMP performance, go to the Google Search Console and access the Performance report. To see your AMP data, click on the “+ New” filter and choose “Search appearance’. This will show you how your search traffic changes over time, which queries are made on mobile devices, and which pages have the highest (and lowest) click-through rate.
- Does AMP affect the user experience?
Yes and no.
AMP is designed to improve mobile user experience by making web pages load faster on mobile devices. But there are some limitations that come with it like AMP restricting third-party scripts, interactive elements, ad features, custom fonts, etc .
Conclusion
Implementing AMP on your Shopify store is a valuable investment that can have a significant impact on your online presence. The lightning-fast loading and improved mobile experience can increase your conversion rates, putting you ahead of your competitors. So if you’re a Shopify store owner looking to improve your mobile experience, consider making the switch to AMP today.

How To Add Meta Tags In Shopify? (Step by Step)
Are you looking to grow organic traffic for your Shopify store? Then meta tags are a big aspect you mustn’t ignore. It helps Google better understand your page information for SEO rankings, and can sometimes help improve your page click-through rates.
Below is the perfect tutorial on adding Shopify meta tags. Let’s get started!
What Is The Meta Tag?
You may have often heard about meta titles and descriptions before. These two are the most commonly used meta tags. But that’s not all.
In fact, meta tag is a much bigger concept. It includes:
- Meta title: what’s the main topic of your web page?
- Meta description: A summarized version of your page content to help Google understand.
- Meta Robots: Tell Google whether to index or noindex your page
- Meta Charset: Tell Google the content type and character set of your page.
- Meta Viewport: Imply to Google your page is friendly for mobile views
- Meta Refresh Direct: Send your visitors to a new page after a certain time.
- No Translate Meta: Prevent your web page content from being translated.
No page read aloud Meta: Prevent your page content from being read out loud by Google TTS services.
All in all, as an essential part of SEO, meta tags are a piece of code to help search engines and web crawlers identify what your pages are about and match them with the right search queries. They affect how Google indexes and ranks your site, and how clients experience it.
Technically speaking, the meta tag is a snippet of text that describes your webpage content. It’s inserted in the <head> section of the HTML code of your web pages.
While some meta tags like the title and description may appear on the SERPs, others are only visible to search engines.
You can view the meta tags of a web page by right-clicking your mouse, and selecting View Source Code.
Here is an example of a Meta tag:

How to add meta tags to Shopify?
There are 3 ways to add meta tags to your Shopify store. Check below.
1. Via Shopify’s built-in SEO field (recommended for sites with limited pages)
There are quite some SEO features available in Shopify. Among them is the meta tag editing field, which is available on homepage, collections, products, contact us and other pages.
Add meta tags to your Shopify homepage
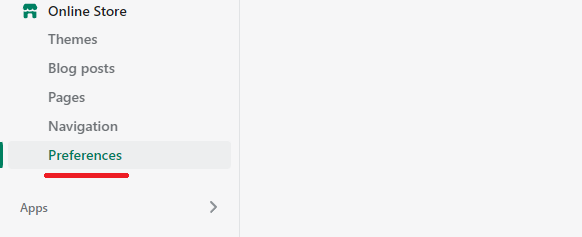
- Navigate to your Shopify admin. Go to Sales Channels > Online Store > Preferences
- Enter a title and meta description for your store. Click Save.
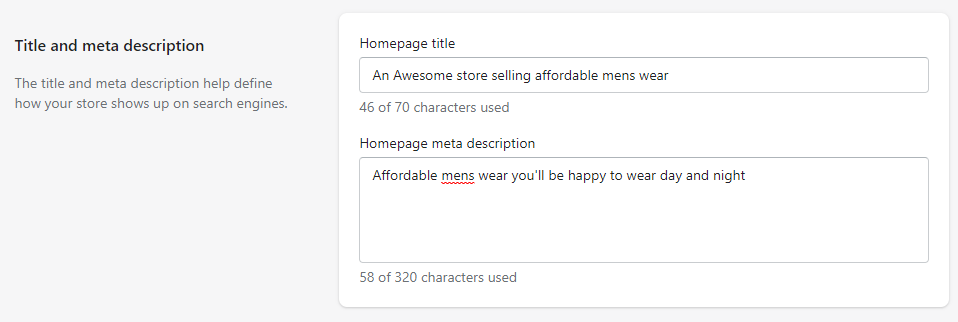
- Check if your meta title has been displayed in the browser tab, and if your meta description already exists in the source code.
Add meta tags to your Shopify product, collection and custom pages
- In your Shopify admin, select a page you want to edit or add meta tags for, and click on it.
- In the Search engine listing preview section, click Edit website SEO.

- Enter the meta description for the search engine listing.

2. Via a third-party app(recommended for multi-page websites)
Needless to say, adding meta tags one by one like above can be exhausting and time-consuming. If you have hundreds of pages on your website, you should consider using a professional SEO app to bulk add or auto-add meta tags. It’s usually easy, simple and quick.
Take SEOAnt SEO & Image Optimizer app as an example. It allows you to generate a bunch of unique meta tags in minutes, saving your workload a great deal.
It takes only 3 steps to get the work done.
- Install the SEOAnt app onto your Shopify store.
- Select Meta Tags in the SEO Basic roll-down menu.

- Select the Meta tag generation rules for your Meta title and description. Click Save.

3. Via your Shopify theme liquid(recommended for custom meta tags)
You can also get into your theme liquid to add your wanted meta tags.
This method is especially helpful when you want to add some custom meta tags (apart from the general meta title and description) to your webpages for redirecting or no-translation concerns, etc.
In case you mess up the liquid file, you should consider backing up your theme first.
Here are the steps:
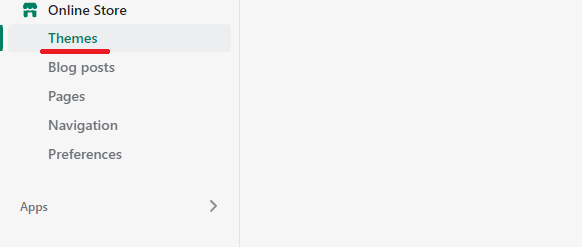
- In your Shopify Admin Panel, go to Online Store > Themes
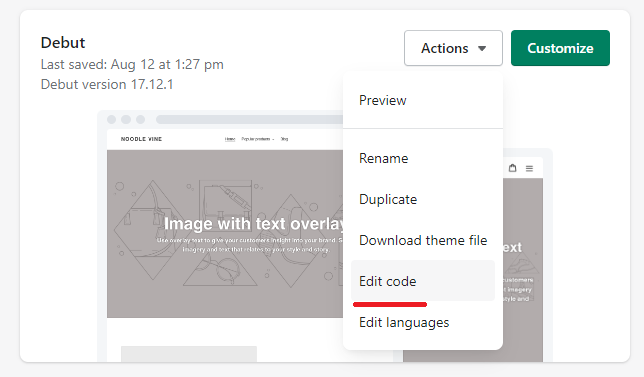
- Click Edit Code from the Action drop-down menu.
- Click the theme.liquid file.

- Paste your custom meta tag into the liquid file. Make sure it’s located between the opening <head> tag and the first <body> section.
- Click Save.
- Confirm if your custom meta tag has been added by viewing the source code.
How to Put Google or Bing or Yandex or Pinterest Verification Code on Your Shopify Home Page?
The Google, Bing, Yandex, or Pinterest verification code can be seen as a custom meta tag. Shopify’s general settings don’t have fields for such tags. Therefore, the best way is via your theme liquid. Same as the 3rd method above.
- Open your Shopify Admin Panel, click Online Store on the left menu, then select Themes.
- From the Action drop-down button, select Edit Code, and then the theme.liquid. file.
- Paste the verification code on the blank line below the opening <head> tag and before the first<body> section, and click Save.
- Meta tag for Google Verification
<meta name=”google-site-verification” content=”…”/>
- Meta tag for Bing Verification
<meta name=”msvalidate.01″ content=”…” />
- Meta tag for Yandex Verification
<meta name=”yandex-verification” …” />
- Meta tag for Pinterest Verification
<meta name=”p:domain_verify” content=”…”/>
Note: You should replace your own content with the ”…” in the verification code provided.
Keys To Writing a Good Meta Title & Description on Shopify?
- Observe the character limits. Google has space for around 160 characters for meta descriptions and 60 characters for titles. You risk having part of your information cut off if you exceed.
- Insert keywords naturally and avoid keyword stuffing. Adding keywords can make Google consider your page more relevant to a specific search query, but it should make sense in the context. Otherwise you are not serving your readers. Also this may be tagged as spam.
- Be unique and straight to the point. Be it a meta title or description, originality is a big concern for search rankings. You need to make the meta tags of every page different from each other.
- Ensure your meta titles and descriptions match the search intent. For example, if your webpage is talking about winter skirts, yet your meta tags are all about winter jackets, Google will simply ignore and replace them with texts extracted from the page content.
- Emphasize your unique selling proposition to be click-worthy. Highlight your products’ unique benefits to set yourself apart from the SERP. For example, state whether you are eco-friendly, all-season, pocket-friendly, 100% natural, unisex, and more.
- Use actionable calls to action. Your future customers are looking for the best deals and convenient service online. Include actionable words like limited stocks, free shipping in your meta tags.
FAQ
- How To Change My Meta Tag On Shopify?
The steps to change and edit your meta tags are the same as adding your meta tags. You can refer to the 3 methods mentioned above.
- Why Is Google Not Showing My Shopify Meta Description?
If you find out that google replaces your meta tags with something else in the search results page, it could be because of the following reasons:
- Google simply considers that your meta tag is not well written enough. Maybe not relevant to the web page content, or not long enough, or too long.
- Failure to reindex your web page. You can try submitting your sitemap on the Google Search Engine for reindexing.
Conclusion
Now, your SEO efforts no longer have to bear no fruits. Apply the keys to writing Shopify meta tags to enrich your content and drive clicks. Follow the steps and tips to change your meta tags if Google avoids them. That way, as you provide relevant information to users, your click-through rates rise by up to 286%.
Shopify SEO Boost: Unlock Higher Traffic with Alt Text Optimization
Struggling to drive in organic traffic for your Shopify store? One often overlooked aspect is your images. According to a study from Baymard Institute, 55% of websites don’t use ‘ALT’ text to communicate the core contents of an image, missing out on a golden opportunity to grow.
Just like how a picture is worth a thousand words, its alt text can be the reason why the image itself doesn’t get lost in the vast sea of e-commerce images. More than that, it impacts your website indexing, visitor experience and many other SEO aspects.
In this guide, I will walk you through the importance of alt text for SEO and how to add, edit and optimize it for your Shopify store!
What is Image Alt Text?
Alt text stands for alternative text, also called alt tag, alt attribute, or alt description. It is used to show search engines what an image is about. It appears on a webpage in place of the image when the image fails to load due to a bad network, the website malfunctioning, etc.
The alt text is added to the HTML code of the image in the form of an “alt” attribute, like this: <img src=”example-image.jpg” alt=”Example fragile red jug placed on a bench”>.
When a browser or screen reader encounters this code, it uses the alt text as a substitute for the image in cases where the image is not able to be displayed.
Here is what the alt text looks like in the HTML file:

Alt texts help search engines crawl and rank images of your website more effectively. With them, your e-commerce products will be seen more frequently in web searches and Google images.
Below, is an example of an image’s alt text:

How does the alt text help improve the SEO of your Shopify store?
Alt text plays a crucial role in SEO by helping search engines understand images and how they relate to the overall context of the page. But it doesn’t stop there.
- Create a positive user experience
Sometimes your Shopify store might just not load images due to a technical or network issue. However, with alt text, visitors can still know what your image is about. This way, ALT text improves your customers’ experience, lowering your website bounce rates, and increasing the number of visitors returning to your website.
- Increase accessibility to crawlers
A crawler is used by search engines to search and index the content of websites on the internet. Adding Alt text to images makes it easier for Google’s crawlers to find and index your image files, hereby facilitating image rankings potentially.
- Drive image traffic
What happens when someone makes an image search of a bucket hat, for example? Since search engines can’t physically ‘see’ images, they will show results of images with ‘bucket hat’ in their alt text. The search engines will also display the link to the websites they’re from. This increases the number of visitors or “traffic” you get from your images with keyword-rich alt text.
According to research by Moz.com, the number of visits resulting from image searches may vary from 20 to even 60% of all visits from Google. Quite obviously, image alt text is something you should take seriously if you want to scale your store’s traffic.
- Aid auditory readers
Thanks to alt text, screen readers and virtual assistants like Siri or Alexa can read information about images aloud to people with bad eyesight. This also caters to audiences who like to multitask with their screen reading articles out.
When an image lacks alt text, screen readers won’t understand the image. Rather, they will only read the “source code” like “image 576” or “image.jpg.” to people. With alt text, you perfectly deliver your content to such auditory readers.
You might think this isn’t a big deal because you only know a couple of people using screen readers. However, auditory readers are more common and have more potential than you can imagine.
Here’s a stat by Adobe that you want to take seriously: Brands see incredible growth potential in voice assistants with 66% of business decision-makers strongly agreeing that voice assistance can help drive conversion and increase revenue; 71% see it improving the user experience.
Image alt text ensures you don’t fall behind the voice market!
How to Add & Edit Image Alt Texts in Shopify Manually?
Shopify has a built-in alt text field for images. In the Shopify admin, when you upload an image or edit an existing one, you’ll see a field labeled “Alt text.”
Adding or editing Alt texts on Shopify is easy, regardless of image type. All you have to do is follow these steps.
- Add Alt Text to Product Images Manually
- Go to your Shopify admin, go to Products > All products.
- Click on a product image, then click on the “Alt” field and enter a brief, descriptive text.
- Click “Done” to save your changes.
- Add Alt text to Theme Images Manually
- Go to your Shopify admin, navigate to the “Online Store” section.
- Locate the theme you want to edit and click “customize”
- From the theme editor sidebar, select the section containing the image that you want to add an alt text to.
- Below the image, click “Edit.”
- After inputting the alt text in the dialog, click “Save”
- Add Alt Text to Blog Images Manually
- From the Shopify admin, navigate to the blog post you want to add alt text to.
- Click on the image, then click on the “Alt” field and enter a brief, descriptive text.
- Click “Save” to save your changes.
- Add Alt Text to Collection Images Manually
- From your Admin Page, click Products then Collections.
- Find the collection you want to edit.
- Go to Collection image and click Edit button, then Edit image alt text.
Now, imagine an instance where you have hundreds of or even thousands of images on your website to optimize? Will you be adding your alt texts one by one? No, remember that time is money! I have a solution that can automate this workflow and make your work as easy as a breeze. Read on!
How to bulk-add Alt text to all Images in Shopify?
You can add image alt texts for your products in bulk, with the help of third-party apps.
Take the SEOAnt app for an example. It takes you less than 1 minute to generate Alt tags for your images in a batch.

Listed below are the steps on how:
- Install the SEOAnt app from the Shopify store, and launch the app.
- Choose Image Optimization in SEOAnt’s dashboard, and go to the IMAGE ALT TEXT section.
- Select what images you want to add Alt texts for, and set up the variants provided.
- Wait for the Alt texts to be generated in one minute.

What else can you do with the SEOAnt app?
- Bulk-compress images: Bulk-compress images without reducing their quality. Select between lossy and lossless compressions. Customize the compression rate you like. You can even add watermarks onto your images.
- Auto-scan your website for SEO issues: Monitor your pages for SEO problems with one click, including site speed, indexability, redirect issues, on-page errors,etc.
- Fix broken links: With its Broken Link 404/301 Redirect feature, you can redirect broken links to target pages, minimizing negative SEO impact.
- Generate structured data: Generate well-structured data to make your website more appealing in the SERPs, improving the click-through rates.
- Keyword research: Confused about what keywords best suit your products? SEOAnt app suggests well-targeted keywords.
- Bulk edit meta description: You can bulk generate and edit the meta tags for your images, saving time and reducing workload.
Tips for writing effective Image Alt texts for your Shopify store
While Alt text is important, not every Shopify store owner knows how to go about it in the right way. Good for you, I have broken the process down into actionable steps. Here you go:
1. Be concise yet very descriptive
A good image Alt text should be concise. It should contain just enough information to describe the image. Words that add no meaning or fluff should be avoided.
Bad example: The image of a white, well-folded t-shirt made out of cotton only.
Good example: A 100% cotton white t-shirt.
2. No Keyword Stuffing
It is helpful to add relevant keywords to your alt text. This attracts image search traffic, but you should not stuff them in. Repeatedly using multiple keywords out of context will likely make your page flagged by search engines.
Bad example: Cloth, gown, red, red gown, embroideries, Shopify, quick sales, red dress sales
Good example: A red gown decorated with embroideries.
3. Don’t include words like “an image of” or “a screenshots of”
Screen readers and crawlers can identify images themselves from the source code. They automatically announce an image as an image. You don’t have to tell them so in the alt text.
If you make this mistake, the screen reader will read out something like “Image, image of an image of a cup on a table.’
But without adding ‘an image of’ to your alt text, it will read normally, ‘Image, image of a cup on a table.
4. Don’t use hyphens
Normally, users don’t include hyphens ‘-’ when they are searching things online. So for SEO reasons, it is best to use what a user would normally input into a search engine.
For example, users will not naturally search for ”shoes-and-bags”. They will just input ‘shoes and bags.’ So, for image alt text Shopify SEO, spaces and normal word structures are always preferred.
5. Make sure each product’s alt tag is unique
One main reason for an alt text is to help the visually impaired understand an image. The purpose is then defeated if one alt tag is not specific or unique enough. Alongside that, having repetitive alt tags for different images might make search engines earmark your content as spam. This will likely hurt your search engine rankings. Ensure your alt tag contains as much unique information about the image as possible, such as the shooting angel, the color, the material, etc.
Bad example: A pair of running shoes
Good example: The rear of a pair of white Xray Footwear, Size 9
Unlike the second, the first is not unique and can easily be repeated for a different item/product.
6. Use keyword terms that your shoppers use
Every target market has search terms peculiar to them. So to attract search traffic, ensure the keywords in your alt text are centered around what visitors search for.
For example, customers are more likely to search for “Cocoa based body cream” instead of “Theobroma cacao-derived body lotion”.
7. No typos
When an alt tag is wrongly spelt, search engines may not understand it. This way, your images won’t show in SERPs when people google images related to your products. This is a total waste of time as it renders the efforts of writing alt tags useless.
8. Don’t give “decorative” photos alt texts
Things like page dividers or trademark designs fall under the category of “decorative” photos. They improve the appearance of objects or visually divide content on a page, but don’t have any context or meaning.
Their alt text is therefore pointless because they won’t help a reader understand the content of the page more. Insert the word “null” in their alt text fields if possible, so that screen readers will skip over them.
9. Add alt text to button images
Does your web page have a button that directs users to another page, or for information submission instead?
Whatever the case, it is important to write an alt text to describe such buttons. This alt text is vital for screen readers and in cases where images don’t load. Just ensure you describe them correctly. For example, you could use ‘a navigation button to move to the next page’ as an alt text, instead of “a button”.
Image ALT tags VS Image file names
Google crawls both Alt tags and image file names. While these two are often used interchangeably, they actually have different functions and structures.
| Image ALT tags | Image file names | |
| Definition | Alt tags are descriptions of an image used by screen readers and search engines to understand the content of an image. | File names are the actual name of an image file, such as “dog.jpg” or “cotton-shirt.png” |
| Location | Alt tags are added to the HTML code of a website, specifically within the “img” tag | File names are the name of the file that is saved on the server or computer |
| Visibility | Alt tags are only visible to users when the image does not load or is blocked by a browser extension. | Site visitors can view image filenames if the website owner has not taken steps to hide them. This can usually be done by right-clicking on the image and selecting “View Image” or “Save Image As” in most web browsers |
| Necessity | Some images don’t need alt tags such as those decorative ones. | All images need a file name before they are locally stored. |
| Structure | Hyphens don’t need to be added in-between words in alt tags. (It’s best to structure your alt tag just like search engine queries) | It is recommended to use hyphens in file names as they are more search engine friendly and can improve your website’s SEO. |
FAQ
Does alt text boost user engagement?
Yes. Alt text can boost user engagement. It creates a better user experience by helping users understand the images that are not loaded properly. Your visitors may interact more and stay longer on your website.
How long should an alt text be for maximum SEO effects?
Shopify claims that your Alt text length is better kept within 125 characters. But what really matters is the quality and relevance of your alt text, not its length. According to an interview with John Muller in April, 2022, a Google Search Advocate:
“…we [Google] don’t have any guidelines with regards to how long your alt text can be…You can put a lot of things in the alt text for an image if that’s relevant for that particular image.”
Nonetheless, try to restrain it to one line. Alt texts beyond the line of an image sometimes don’t appear.
What’s the consequence if I don’t add Alt text for my images?
- When your image does not have an alt text, it will be difficult to be indexed by search engines. You lose opportunities to gain more traffic via image search.
- Visitors might also find it hard to understand how your image relates to your site’s content. Worse, they might even consider your website unreliable and leave for somewhere else.
- Plus, not having alt text will also prevent people using screen readers from understanding your images.
Can alt text be the same as image title?
While it doesn’t impact your SEO negatively, it can be bad for your visitors. So it’s not recommended.
The alt text should describe your image itself. But the image title helps your image make sense in the context instead.
Alt text: A red apron with slits in front
Image title: A red apron with slits in front. Overlap design by Sarah Infantino.
Why is my alt text not showing up?
If your alt text exceeds the image’s width, it will sometimes be hidden entirely. However, this can also happen due to code issues.
You can:
- Try to cut down your alt text length.
- Contact Shopify support. Provide them access to your theme, and they will troubleshoot for you.
- Clear your cache. Modern sites often run many layers of caching simultaneously. As good as this is, the result is that sometimes your newly added alt tags are not updated. Cache-clearing may fix the issue.
Shopify Product Tags SEO: Does It Help Your Website?
As a Shopify store owner, often you need to organize your products, track inventory and create discount codes. That’s where the product tags come in handy. They also help your customers filter and find desired products and recommendations.
But how do they impact your Shopify SEO? In the article, you’ll have answers to everything about Shopify product tags. Let’s find out.
What Are Product Tags?
Product tags are labels to classify your Shopify products. They often contain phrases or keywords to help sort and identify items in your store.
For example, if you have a clothes shop on Shopify, you may use keywords like “casual,” “professional,” “red,” “linen,” etc as the product tags. While your site visitors can’t see them, you can use them to categorize products and organize customers’ search results.This way, it becomes easy for your customers to search for and find an item(s) of their liking in your Shopify collection.
Note:
- No matter what your product types are, it is ideal to use your customers’ most used search terms.
- According to Shopify, you can use up to 250 tags to label one product of your store.

Examples of Product Tags
You can come up with custom tags to give identity, personality, and life to your products. Here are some common examples:
- Color: This is common for stores selling items like apparel, where color is a big buyer concern. Your tags can read yellow, green, purple, etc.
- Material: Such tags are helpful when sorting items like seat covers made from different materials. The tags include nylon, cotton, silk, leather, and more.
- Season. This is an ideal way to categorize season-specific products. Use tags like spring, summer, autumn, winter, etc. It will be easy for you to bulk track or hide goods when considering a promo or super sale, as the season ends.
- Price range: These are tags aimed at customers and prospects who budget their expenditures.
- Gender. Apply male, female, and unisex tags to sex-specific items. These can be accessories, clothes, toys, perfumes, etc.
- Age. Differentiate your products based on the age of the intended users. For example, young adults, kids, and adults.
- Style. These come in handy for customers with specific aesthetic preferences like gothic, bespoke, chic and more. Examples include decorations and art pieces, etc.
- Recommendation. Some common tag examples include “hottest”, “top-selling”, “popular”, etc. They help push undecided customers and those who are okay with suggestions to shop. You can also use these tags to market new arrivals.
- Unique qualities. These tags simplify how you find products with outstanding selling points in a Shopify store. A popular example is “100% natural.”
- Offers: They describe a promo scenario when a package goes for a lower price than its usual cost. For example, “free shipping”, “Buy 1 Get 1 free”, etc.
What Are Shopify Product Tags Used for?
Although customers may not always see them, Shopify product tags have paramount importance to ease your pressure in store management. Here are some of its uses:
- Grouping and filtering products
You can use product tags to categorize items by product type or special features like the above, tracking products based on color, size, or price customization. This helps you manage your store efficiently and easily. It also acts as a filter for you and your customers to find the desired items quickly.
- Enabling smooth navigation
This is where you add product tags to your store’s menus to update product navigation and categorization. Your website visitors have a better browsing experience as they are only a click away from their desired product.
- Facilitating catalog management
Tagging products allows you to perform bulk actions on your store items. Say you run a shoe store. When winter is over, you can hide all shoes tagged “winter” in a batch, and launch all “spring” tagged items at once. This reduces your workload and eliminates manual errors, freeing your hands to improve your store further.
- Segmenting customers
Shopify allows you to divide customers into chunks based on their behavioral data and demographics. Upon building new segments, you must modify the product tag in a way that appeals to any particular customer group. For example, the word ‘rainbow’ for a label will appeal to people in the LGBTQIA+ movement.
How To Add or Delete A Shopify Product Tag?
Adding or deleting a product tag in your Shopify store is very easy, taking only a few steps.
How to create a Shopify product tag:
- Head to your Shopify Admin, then click the Product tag. Select the product you want to tag.
- Enter the tag name in the Tag section. Or click View all tags to select an existing tag for editing from the Tag list.
- Click Save.
How to delete a Shopify product tag:
- Open your Shopify Admin and go to the products page.
- Select the product you want to remove a tag from.
- Scroll to find Organization and click X next to the specific tag you want to delete.
Do Product Tags Help Your Shopify SEO?
Yes and no.
In some ways, Shopify product tags can help your SEO efforts. Since they help users navigate through your website smoothly, it enhances the user engagement and experience, which indirectly benefits your store SEO performance.
Shopify automatically creates a new page with your tag inserted in the URL also. This way, these tag pages will be treated as standard content by Google. If your tag pages are well-organized, unique and with high-quality content, it can be a big boost to your site SEO.
However, if your tag pages are almost identical to each other, with the H1, collection description, content, and meta description, etc being the same (which is very likely), it will reduce the overall SEO quality of your website, resulting in wasted crawl budget and missed opportunities as you can’t customize these pages for SEO.
What’s more, tag pages with thin content tend to have keyword stuffing issues, and are likely to be penalized by Google.
How to Use Product Tags To Improve Your Shopify SEO Performance?
There are multiple ways you can maximize the benefits of product tags to your store, while not not being impacted by its downsides. Follow the tips below to handle your product tags, so as to improve your Shopify SEO performance.
- Use rel=” canonical” tags.
This is an HTML tag to help search engines differentiate between the original page and duplicates with similar content.
Whenever you create a tag, there will be a tag url generated. When there are dozens of tag pages with similar content, Google may have difficulty in identifying which page to display first. Canonical tags in such cases, recommend the main version of your content for bots to crawl that one page.
You’ll need to get into your theme.liquid template file and replace <link rel=”canonical” href=”{{ canonical_url }}” /> with:
{% if template contains ‘collection’ and current_tags %} <link rel=”canonical” href=”{{ shop.url }}{{ collection.url }}” /> {% else %} <link rel=”canonical” href=”{{ canonical_url }}” /> {% endif %}
- Use no-index/no-follow.
No-index is often used to prevent pages like internal search results, thank you, and admin and login from showing up in SERPs, since they provide no valuable information, and are unique to individual customers.
You can also noindex the urls of your product tag pages, stopping them from being crawled and indexed by Google.
Simply add this code to your theme.liquid file:
{% if template contains ‘collection’ and current_tags %} <meta name=”robots” content=”noindex, follow” /> {% endif %}
Alternatively, you could apply a rel=”nofollow” HTML tag. Nofollow links don’t transfer PageRank, meaning they have no direct impact on your website SEO.
- Modify robots.txt on Shopify.
A robots.txt is a special file that instructs crawlers on what pages to or not to access on your website. For example, you can create a rule to deny a bot(s) access to your tag URLs or directories. But, you need to be careful because this can cause issues on your site, especially if you use default product links. They could also be blocked from robots. So, I recommend consulting some SEO experts to guide you through.
- Use product tags as keywords in page content, URL, and meta.
Find out which keyword customers use to refer to your products. Use them as product tags and include them in your page’s content, and meta description, etc. This way, the product tags account for mainly a small part of your whole page, which avoids penalties while making your content more targeted.
What to Note When Writing Product Tags?
- Clarity to outside eyes
It is vital to create product tags that resonate with your site visitors. This is especially true if your product tags appear in your Shopify theme’s drop-down menus. You need them to be simple for customers’ understanding. For instance, the correct tag for the 2023 winter jacket collection would be Winter Jacket 2023 and not wtjacket23.
- Keep your tags short and concise
Use tags with no more than 16 characters. That’s because most people use one or two words to search for products on the internet. For example, blue jeans, winter jackets, and more.
- Apply the search terms your customers may use
Ensure you have appropriate product tags that describe your Shopify product with relevant search terms. Find keywords and phrases that are likely to be used by your site visitors. A good way to start is to review the Shopify Behavior Reports to know your customers’ top searches. That lets you analyze their expectations and can improve your product tags using the exact search terms.
Frequently Asked Questions
Q1: How many types of Shopify tags are there?
Shopify has several types of tags, including:
- Product tags. Group and organize your Shopify products into different categories, usually with easy product selection and as filters.
- Transfer tags. Tag transfers made with vendors or locations for better tracking. Examples are “urgent”, “reoccurring”, “incoming stock amounts”, etc.
- Customer tags. Useful for giving relevant details when describing your customers. Some examples are “tax exempt”, “VIP”, “lost”, “returning customer”, etc.
- Blog post tags. If you run a blog along your store, these tags help organize your blog posts. They also narrow down how your site visitors find specific content.
- Order/Draft order tags. These tags allow you to organize orders by fulfillment regions, delivery status, and expected delivery dates. Common examples include “clearance”, “analyzed”, “test”, “packed”, and more.
Q2: Can product tags negatively affect SEO?
Yes. Although product tags are a great practice, they can harm your SEO if you fail to take the right actions. Every time you make a tag, Shopify produces a duplicate page that may confuse Google bots on which page to rank. This is bad for SEO because search engines may show up the page that’s not intended in the top search results.
Q3: Can you reuse Shopify product tags?
Yes, Shopify product tags are reusable. After you create a new tag on your Shopify store, it automatically gets saved for future use, which saves you time, effort and resources.
Conclusion
Without a doubt, Shopify product tags can be a shot in the arm for your SEO efforts. Creating them is easy too. Heed the tips above to use your product tags to boost your Shopify performance.
For more comprehensive SEO efforts, consider leveraging the services of free Shopify SEO booster apps like SEOAnt, which offers image compression and broken link redirects, Alt text optimization, structured data generation among others, to optimize your website in different ways.