


Table of Contents
What is instant index
Google Search operates in three main steps:
Crawling
Google uses a web crawler program called Googlebot to discover new and updated web pages on the internet. The crawler continuously expands its search scope by following links on web pages, collecting various types of information.
Indexing
The crawled web pages are analyzed and processed, with their content—such as text, images, and videos—extracted and stored in Google’s database. The indexing process categorizes and organizes the content to enable quick retrieval.
Ranking
When a user conducts a search, Google retrieves relevant content from the index and ranks the results based on various factors, such as keywords, page quality, and user location, to display the most relevant and useful web pages.
Through these three steps, Google ensures that users can quickly find high-quality search results.
Instant indexing: This allows newly released or updated web pages to be quickly discovered and included by the Google search engine, thereby displaying them in search results faster. This is particularly important for news sites, blogs, and sites that need to update content frequently, as they need to ensure that their content can be quickly found and accessed by users. Because the feature talks to Google on your behalf, you first need to create a set of credentials inside your own Google Cloud account and then connect them to SEOWILL.
This guide walks you through the entire process from start to finish. It takes about 10–15 minutes and only has to be done once.
How to obtain the instant index key
To assist you in obtaining your API Key, please refer to the following guide and video for better understanding:How To Use Instant Index Video
Before You Begin
Please make sure you have the following ready:
- A Google account that is a verified owner of your website in Google Search Console. This is required—authorization will fail if the account does not own the site.
- Access to the Google Cloud Console.
- The SEOWILL app installed on your Shopify store.
Step 1: Create a Project
A project is the container that holds your API settings and credentials.
- Open the Google Cloud Console.
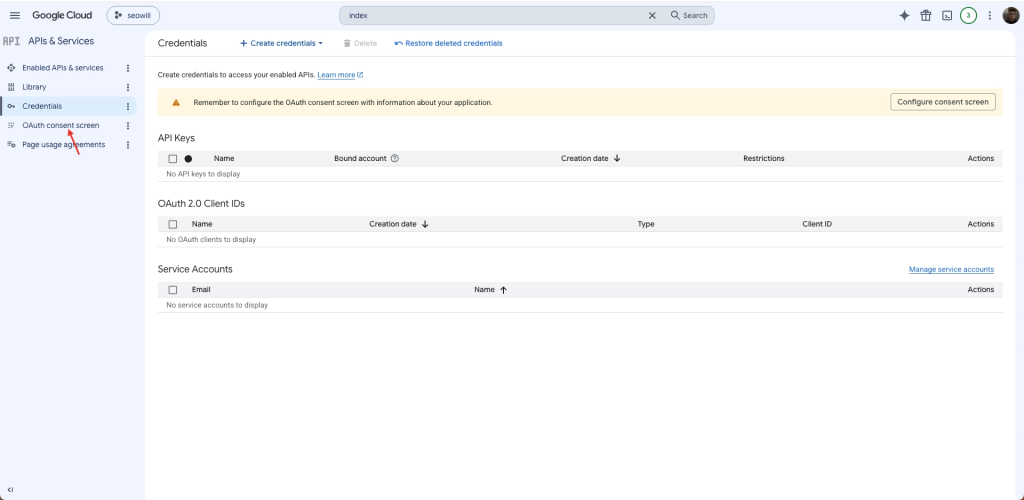
2. In the left navigation menu, go to APIs & Services → Credentials.

Navigate to APIs & Services > Credentials
3. When the Credentials page opens you will see one of two situations:
- No project yet — click Create project.
- A project already exists — click the project name at the top, then click New project in the dialog.
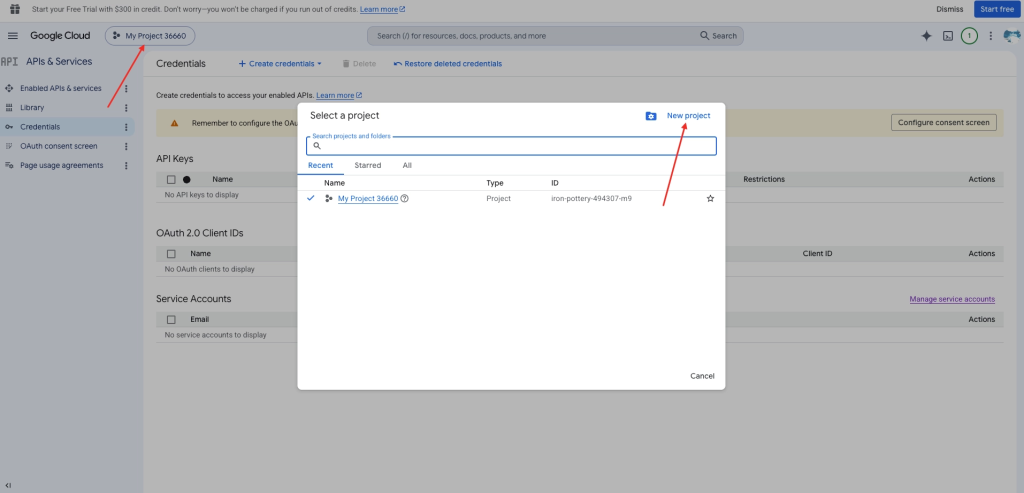
Click New project to create a dedicated project
4. In the project name field, enter seowill and click Create.
5. Wait a few seconds. A confirmation notification appears once the project is created.
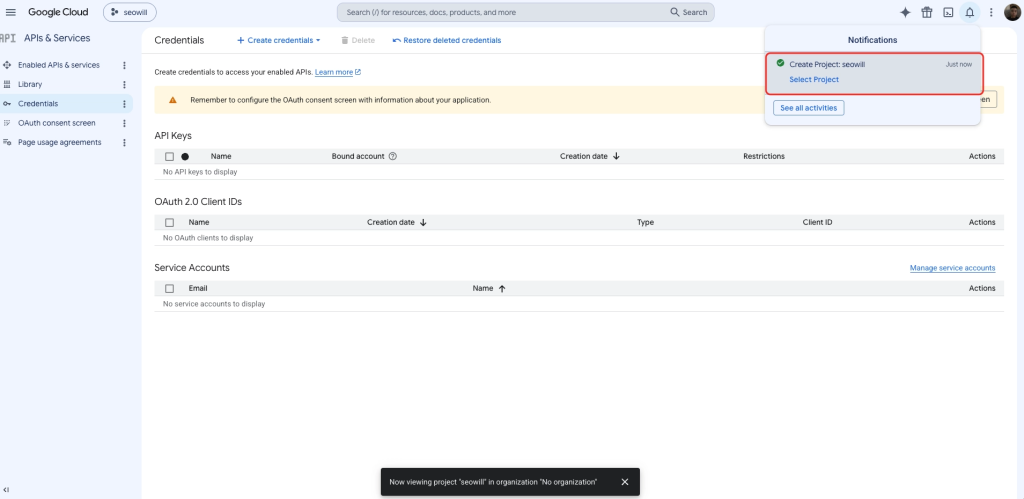
Project created confirmation
Step 2: Enable the Web Search Indexing API
This API is what allows your pages to be submitted to Google for indexing.
- In the search bar at the top of the console, type
index. - From the results, click the first item: Web Search Indexing API.
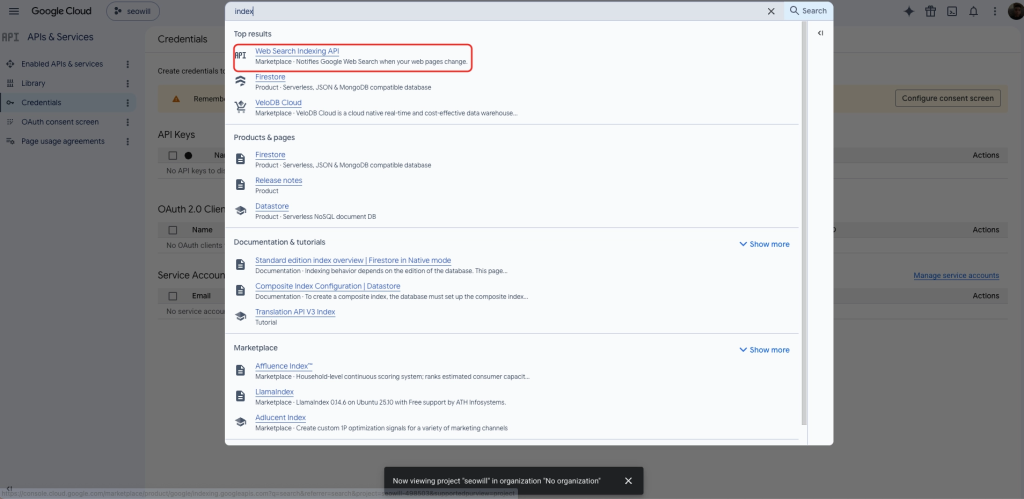
Search for and select the Web Search Indexing API
3. On the API page, click Enable. The console automatically returns you to the APIs & Services area once it is enabled.
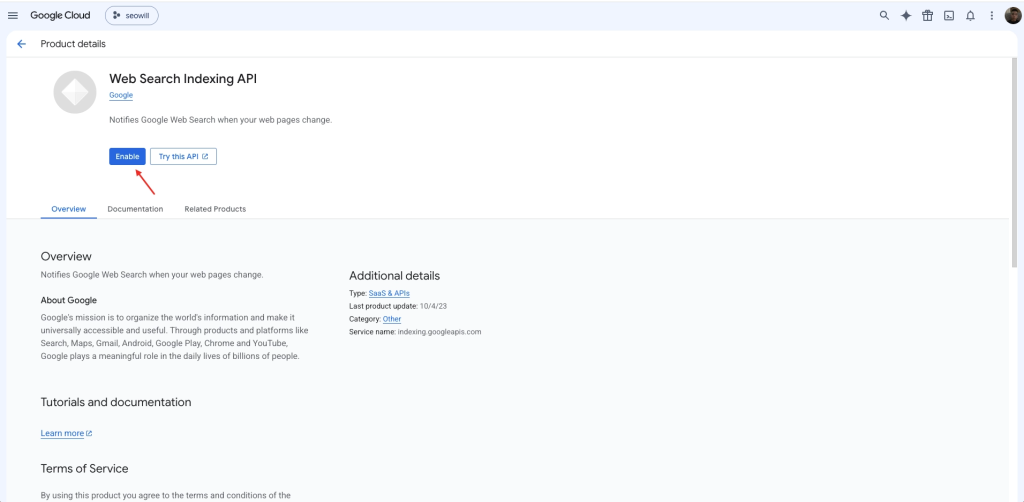
Click Enable
Step 3: Configure the Google Auth Platform (OAuth Consent)
This step tells Google what your app is and who it’s for.
- In the left menu, click OAuth consent screen.
Open the OAuth consent screen
2. Click Get started.
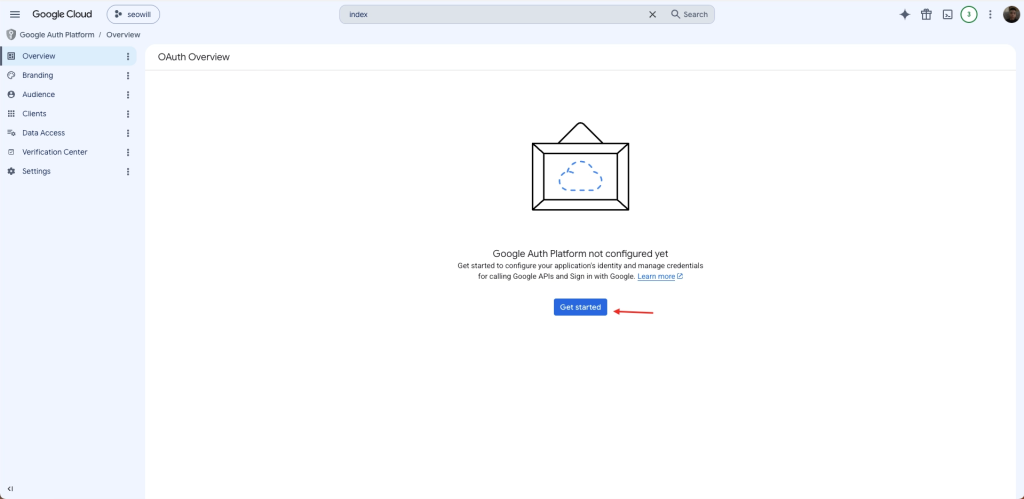
Click Get started
3. Under App Information, set App name to seowill and select your email address as the User support email, then click Next.

Enter the app name and support email
4. Under Audience, select External, then click Next.
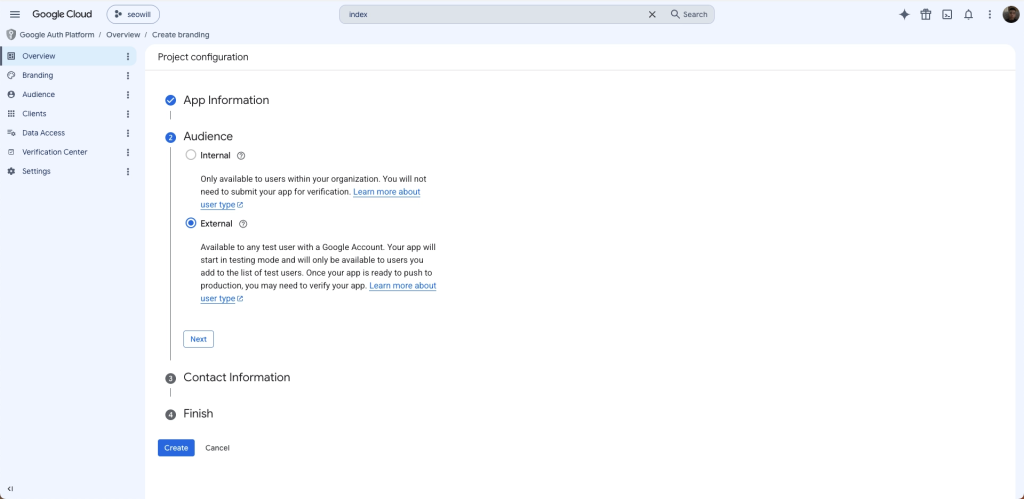
Select External as the audience
5. Under Contact Information, enter your email address (this is where Google sends project notifications), then click Next.
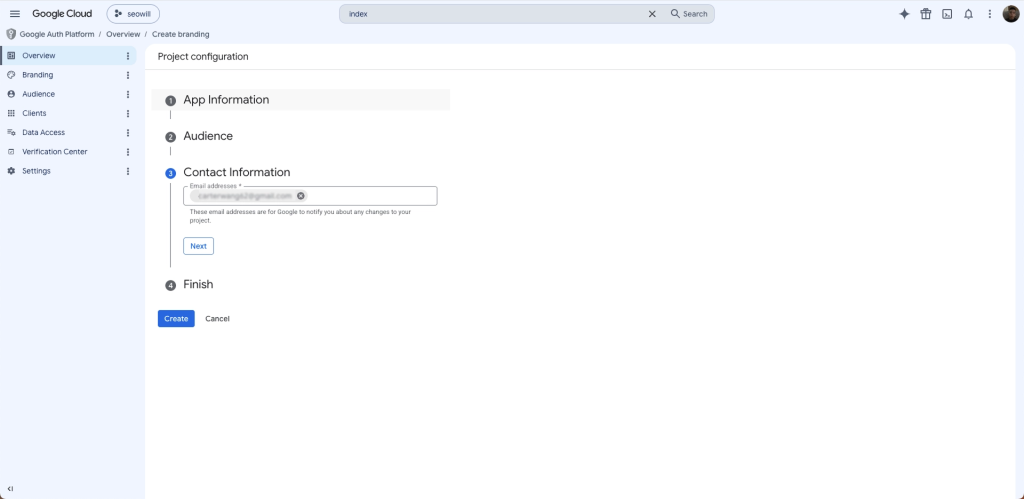
Enter your contact email
6. On the Finish step, check the box to agree to the user data policy, then click Create.
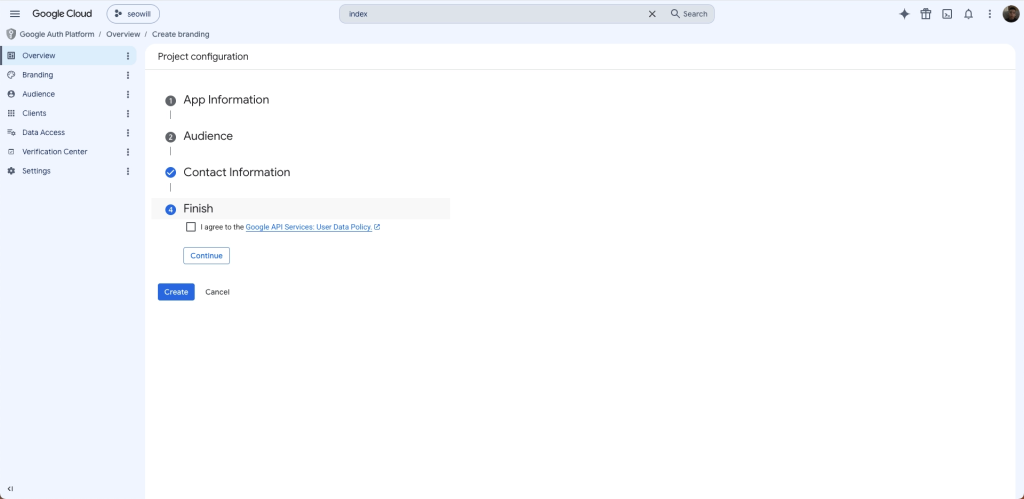
Agree to the policy and finish
After creating, Google returns you to the OAuth consent screen page (path: APIs & Services → OAuth consent screen).
Step 4: Publish the App
By default your app is in “Testing” mode. You need to publish it so the connection works for your live account.
- In the left menu, click Audience.
- Under Publishing status, click Publish app.
- A “Push to production?” dialog appears. Click Confirm.
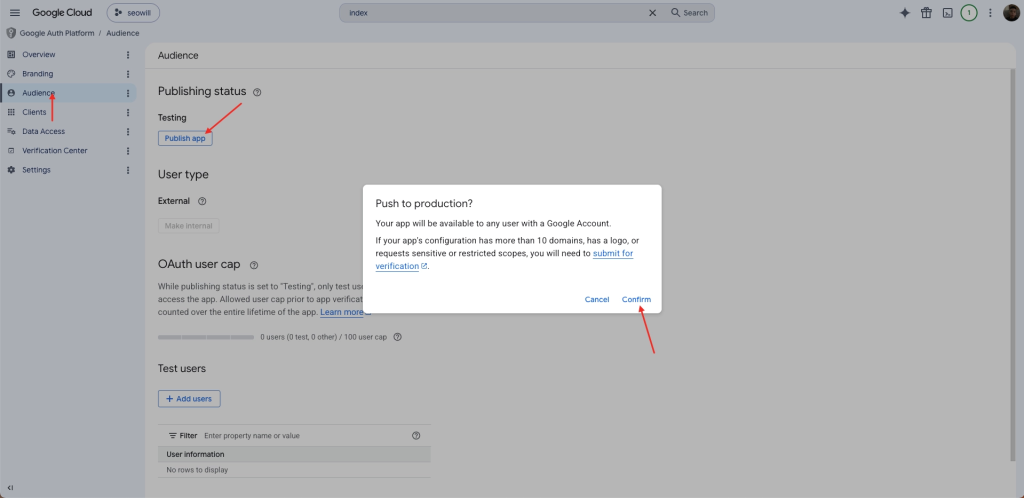
Publish the app to production
Step 5: Add Data Access Scopes
Scopes define exactly which permissions your credentials are allowed to use.
- In the left menu, click Data Access.
- Click Add or remove scopes. A panel slides in from the right.
- Scroll to the bottom to the Manually add scopes box and paste both of the following scopes (each on its own line):
https://www.googleapis.com/auth/webmasters
https://www.googleapis.com/auth/indexing
4. Click Add to table, then click Update.
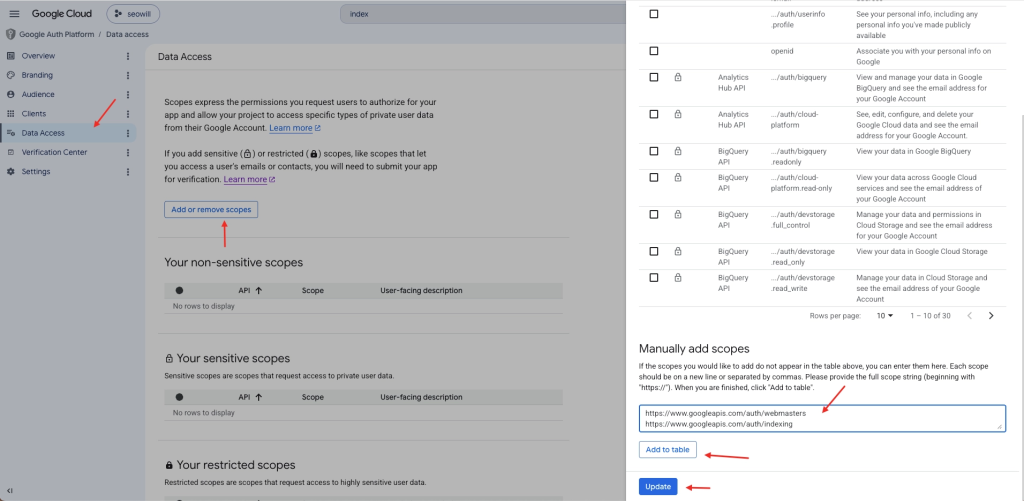
Manually add the two required scopes
- Back on the Data Access page, the newly added scopes appear. Click Save.
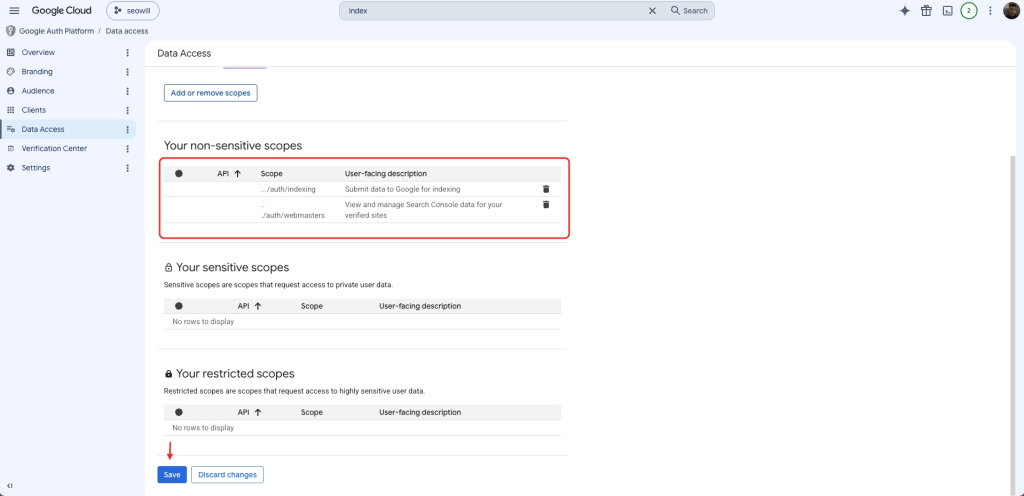
Save the data access changes
Step 6: Create an OAuth 2.0 Client ID
This generates the actual credentials SEOWILL will use.
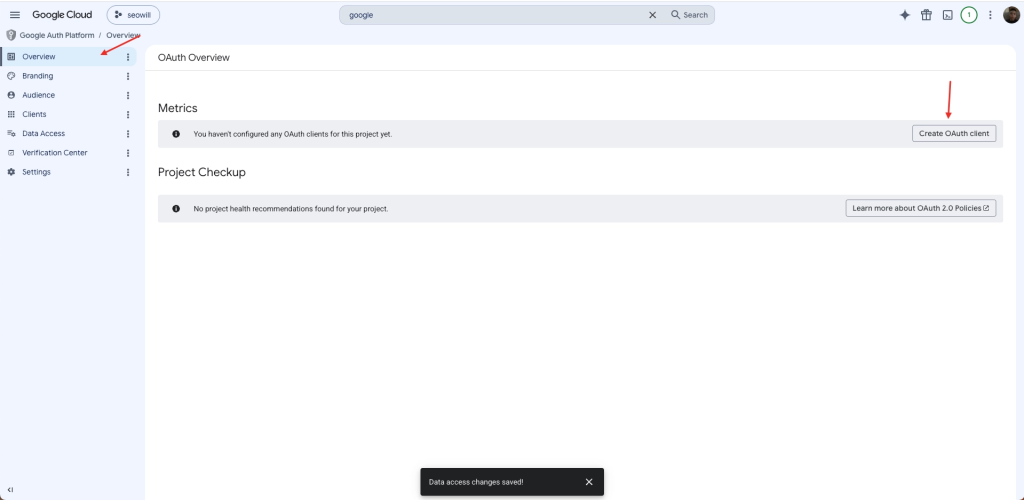
- In the left menu, click Overview.
- Click Create OAuth client.
Create an OAuth client
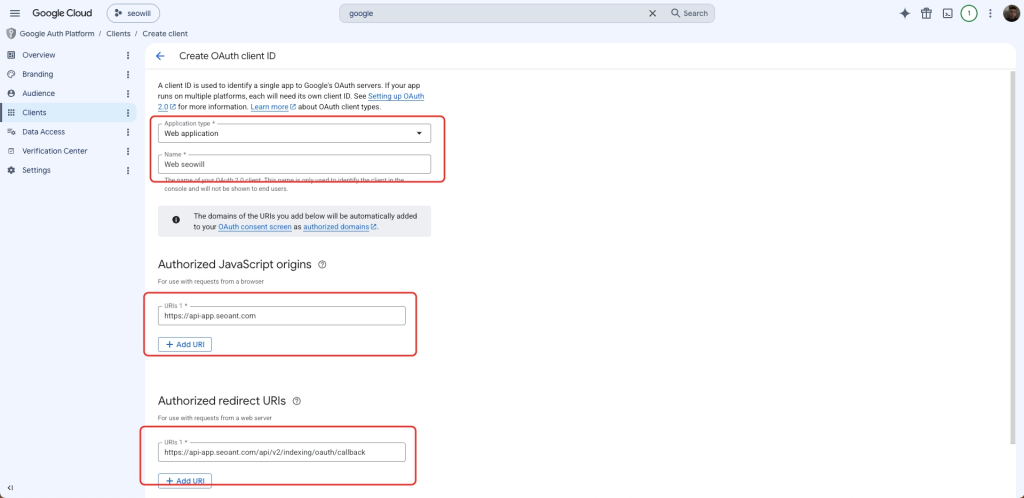
- Set Application type to Web application and Name to Web seowill.
- For Authorized JavaScript origins → URIs 1, enter: https://api-app.seoant.com
- For Authorized redirect URIs → URIs 1, enter: https://api-app.seoant.com/api/v2/indexing/oauth/callback
Important
Copy these two URLs exactly. A single typo will cause the authorization to fail.
Fill in the Web application details and URIs
- Scroll to the bottom and click Create.
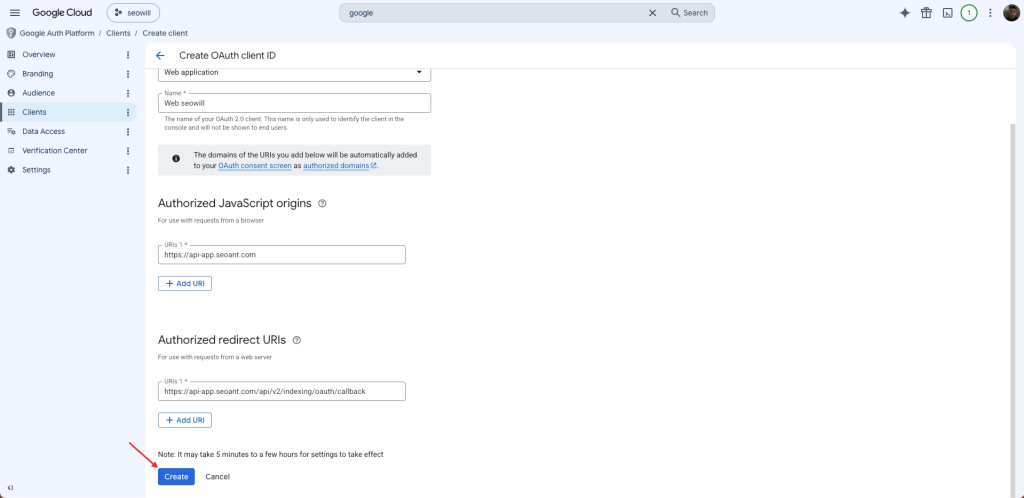
Click Create
- A confirmation dialog appears. Click Download JSON and save the file somewhere you can find it.
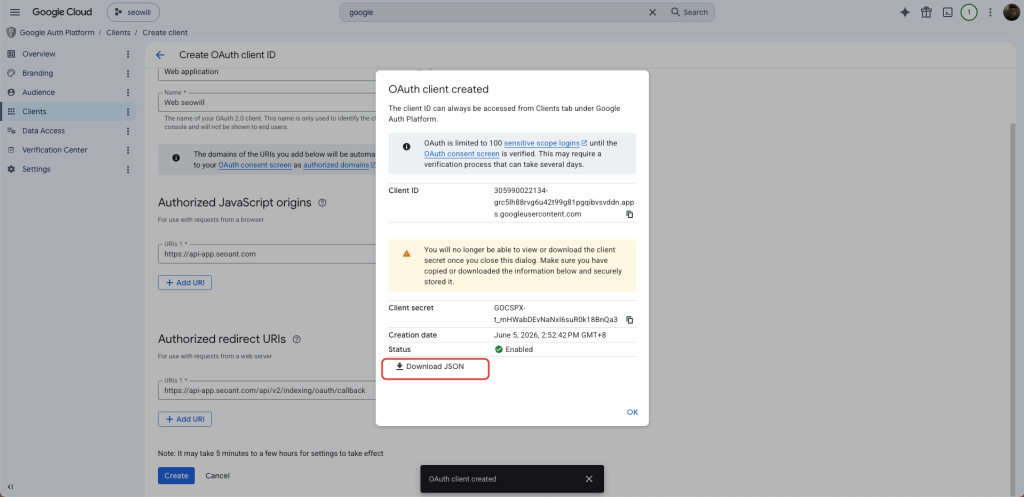
Download the credentials JSON file
How to use the instant indexing feature
Step 7: Upload the JSON File
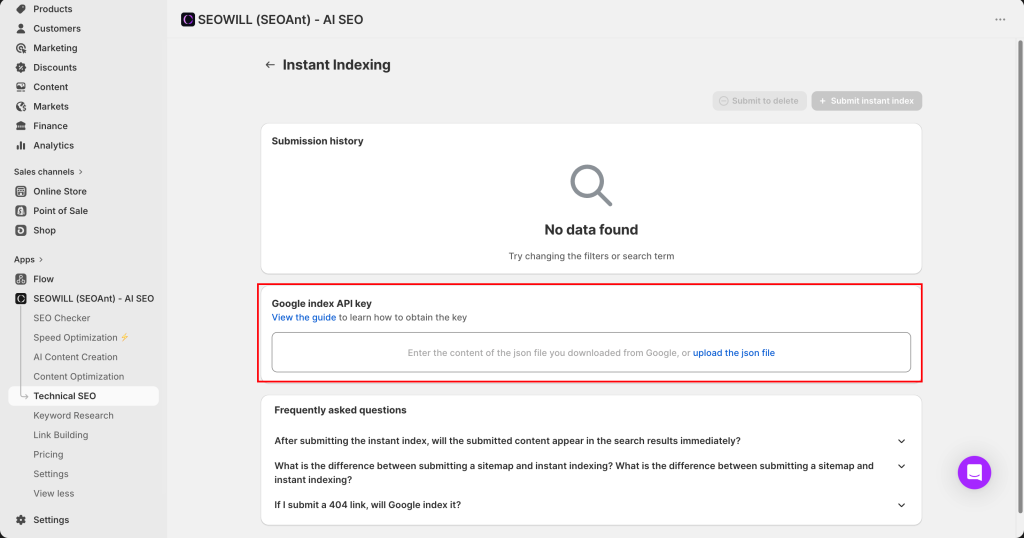
- In your Shopify admin, open SEOWILL and go to Technical SEO → Crawling & Indexing → Instant Indexing.

2. In the Google index API key section, click upload the json file and select the file you just downloaded (you can also paste the file’s contents directly into the box). Then click Save.
Upload the JSON file
Step 8: Link Your Google Account
- After saving, you’ll be prompted to link your Google account. Click to start, then choose the Google account that owns your website in Search Console.
- Approve the requested permissions.
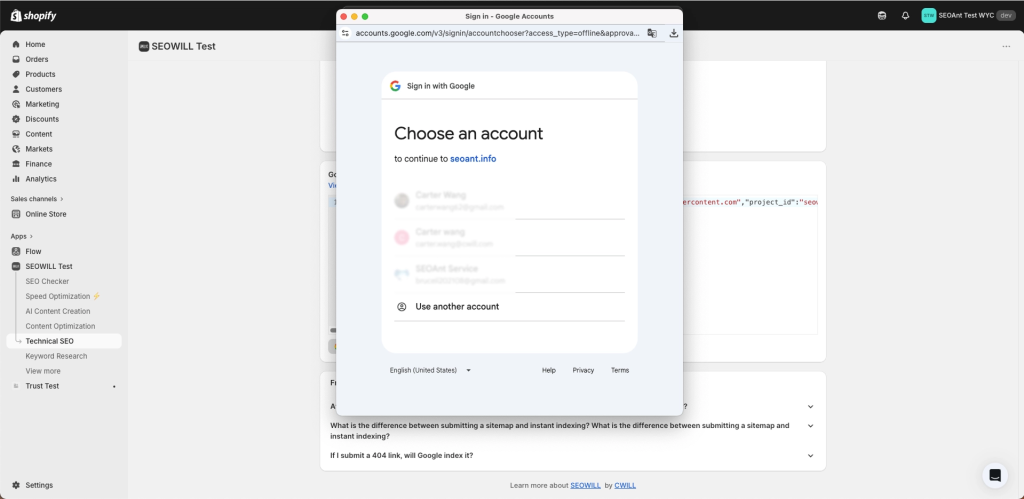
Choose the Google account to authorize
Reminder: The account you authorize must be a verified owner of your website in Google Search Console, or the connection will not work.
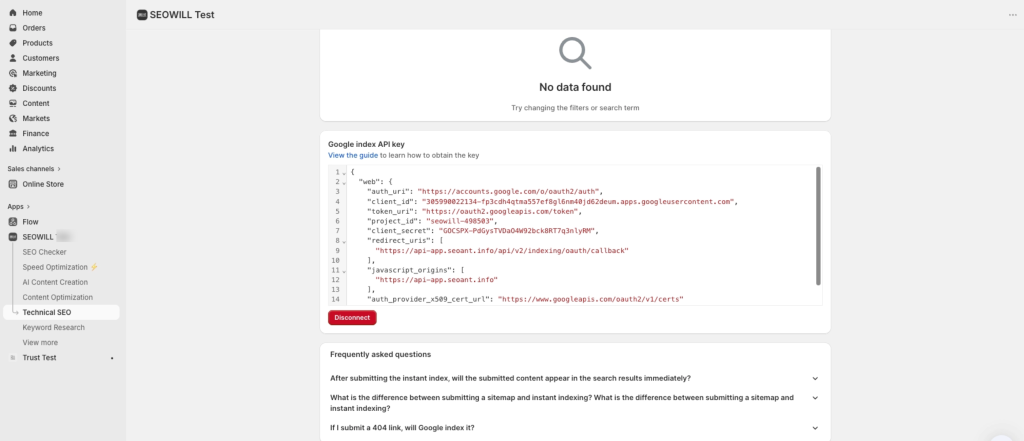
Done!
Once linked, the credentials are saved and Instant Indexing is active. You can now submit URLs to Google directly from SEOWILL, and your submission history will appear on this page.
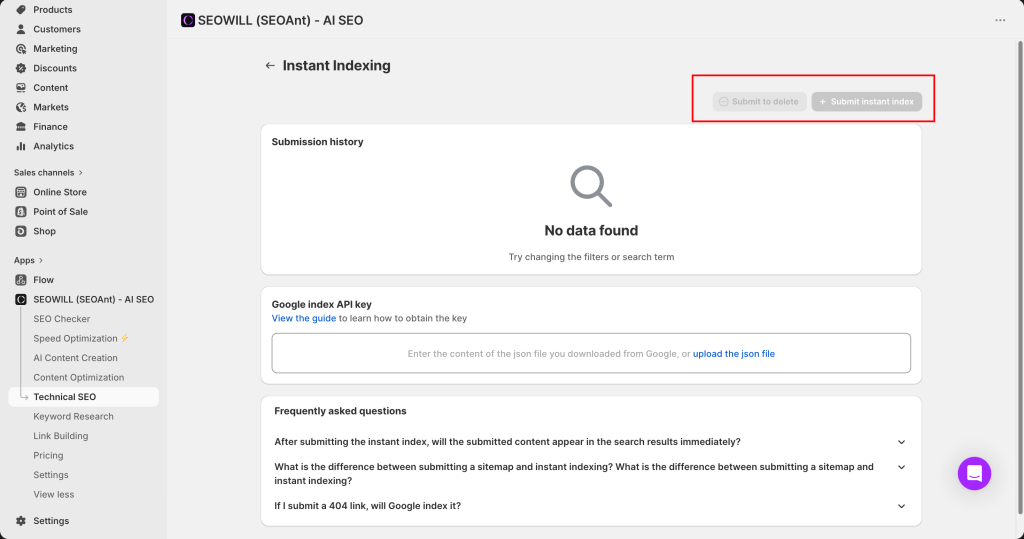
Submit the pages you want Google Search to index or delete
Setup complete